

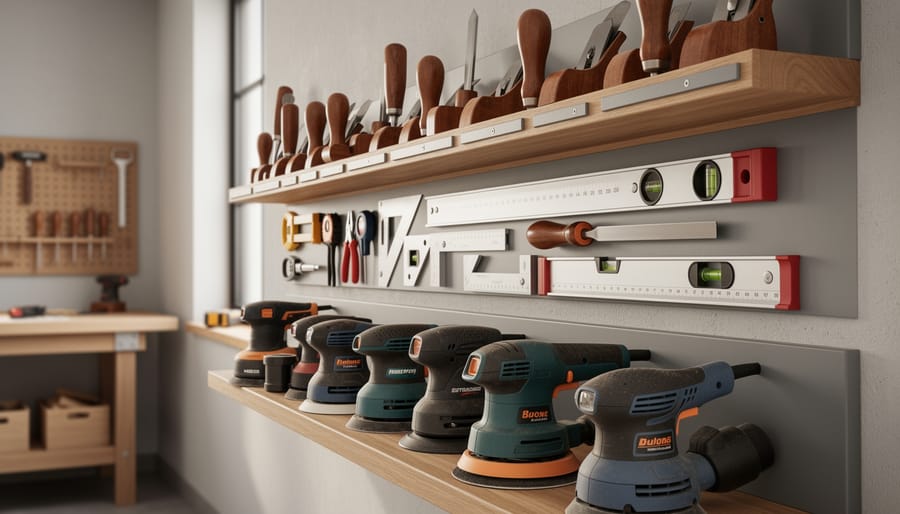
Level storage ideas organize your workshop by height, placing frequently used tools at arm level, larger equipment on the floor, and seasonal items overhead to maximize every vertical inch of space.
This approach transforms cluttered workshops into efficient workstations where every tool has a designated zone based on how often you reach for it. Instead of digging through drawers or piling everything on a single workbench, you’re creating dedicated levels that match your natural workflow. Your everyday chisels and hand planes stay at eye level where you can grab them without thinking. Heavy power tools anchor the bottom zone. Specialty jigs and rarely used accessories move to upper shelves.
The beauty of level-based storage lies in its flexibility. You can start with one zone and expand as your tool collection grows, building each storage solution to fit your specific workshop dimensions and the tools you actually own. This isn’t about buying expensive pre-made systems or following someone else’s layout. You’ll be creating custom storage that adapts to your space, whether that’s a compact garage corner or a dedicated woodworking shop.
The seven methods we’re covering range from simple floating shelves you can build in an afternoon to French cleat systems that let you reconfigure your entire wall layout whenever your needs change. Each project includes clear building steps, material lists, and tips for customizing the design to match your workshop and skill level.
Why Level-Based Organization Works in Workshop Storage
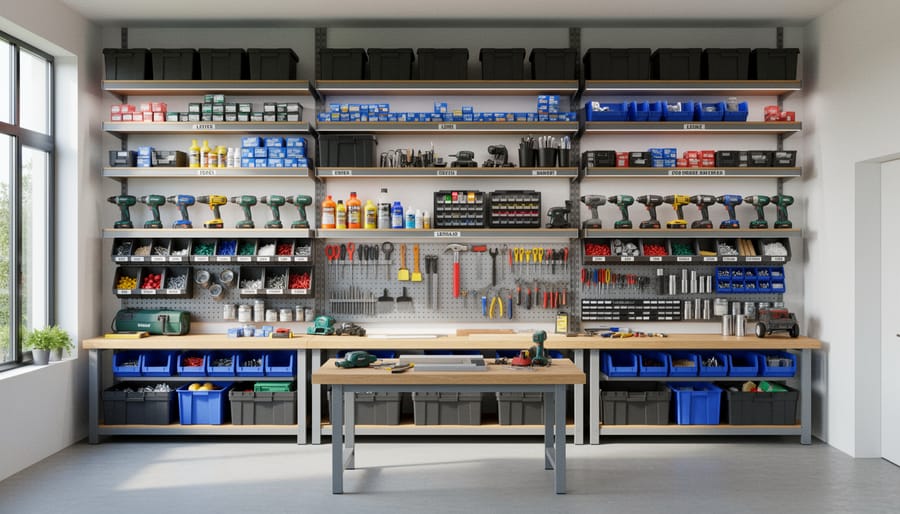
Your workshop layout directly impacts how efficiently you work and how much physical strain you experience during projects. Level-based organization takes advantage of natural working heights to place tools where you’ll actually use them most effectively, similar to how thoughtful design improves workplace productivity in office environments.
The philosophy behind organizing by level starts with ergonomics. Tools you grab constantly belong at eye level (60-72 inches) or waist level (36-42 inches) where you can reach them without bending, stretching, or straining your back. Heavy equipment stays low to the ground where you won’t risk injury lifting it, while lightweight, occasionally-used items can go overhead on ceiling-mounted racks.
Frequency of use drives the entire system. Your most-reached-for tools earn prime real estate at comfortable working heights, while seasonal or specialized equipment gets stored high or low where it won’t clutter your active workspace. This approach also improves visual accessibility since you can scan tools at eye level instantly rather than digging through drawers or bins.
Weight distribution matters for safety and longevity. Placing a heavy table saw on an overhead shelf invites disaster, while storing finish nails on the floor wastes valuable space. The seven storage ideas that follow each target a specific height zone matched to the tools’ weight, size, and how often you need them during typical projects.
1. Eye-Level Pegboard Wall for Daily-Use Hand Tools
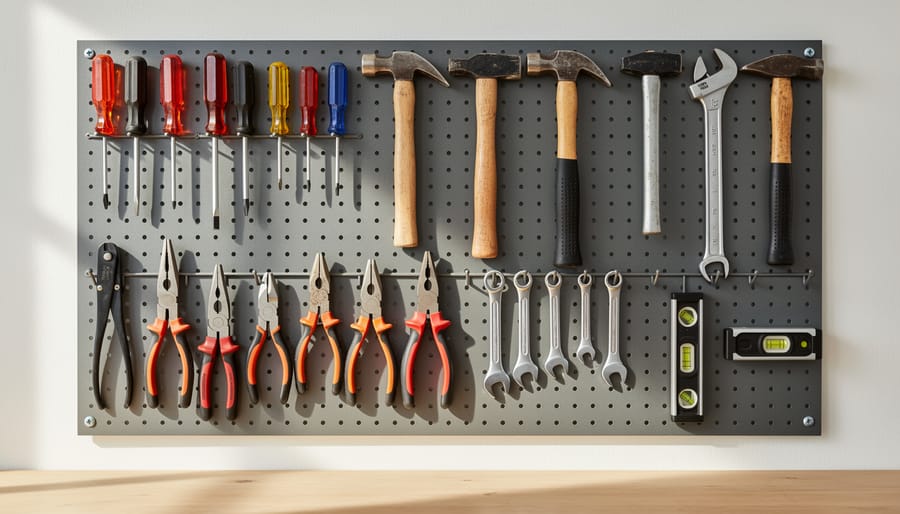
Mount your pegboard between 60 and 72 inches from the floor, positioning it where you can see and reach woodworker tools without stretching or stooping. This height range puts your most-used tools directly in your line of sight when standing at your bench, cutting down on the constant bending and searching that wastes time during a build.
Install the pegboard with at least a one-inch standoff from the wall using furring strips or spacers so the hooks have room to grip. For maximum stability, anchor into wall studs every 16 inches. Once mounted, arrange your daily-grab tools in zones based on function rather than size. Keep measuring and marking tools together on one side, driving tools clustered in the middle, and cutting tools on the other end.
The tools that earn prime eye-level real estate are the ones you reach for multiple times in every session:
- Measuring tapes and combination squares for constant layout checks
- Pencils and marking knives that need to stay sharp and accessible
- Your go-to screwdrivers in Phillips and flathead sizes
- Small hand saws like dovetail or coping saws for detail work
- Marking gauges and other layout tools you use for joinery
Create tool outlines by tracing each tool onto contact paper or using a permanent marker directly on the pegboard. These shadows make returning tools to their spots automatic, and you’ll spot a missing hammer or square at a glance. Space hooks three to four inches apart for hand tools to prevent crowding and tangling. Tools hung at eye level should pull off smoothly with one hand without bumping neighbors, keeping your workflow smooth when you’re mid-project and covered in sawdust.
2. Waist-Level Workbench Tool Tray for Active Projects
A shallow tool tray running along the back edge of your workbench creates the perfect holding spot for whatever project you’re tackling right now. At 36-42 inches high, this waist-level storage puts chisels, marking gauges, squares, and hand planes exactly where you need them without cluttering your primary work surface.
Build your tray 2-3 inches deep and 4-6 inches wide, running the full length of your bench or just the sections where you work most. This shallow depth prevents tools from getting buried while keeping them contained and preventing roll-offs. You can construct a simple version from 1×4 or 1×6 pine boards, screwing a front lip piece to side supports that attach directly to your bench’s back rail.
For better organization, add vertical dividers every 8-12 inches to create distinct zones. I cut mine from 1/4-inch plywood scraps and space them based on the tools I use together. Chisels and marking tools go in one section, measuring and layout tools in another, and finishing supplies in a third. This keeps similar items grouped while preventing everything from sliding into a jumbled pile when you grab one tool.
The real advantage shows up mid-project. Instead of walking to your main tool cabinet every time you need a different chisel or switching between layout tools, everything for your current build stays within arm’s reach. When you finish the project, clear the tray and load it with tools for the next one. This rotation keeps your general storage organized while giving active tools their own dedicated space.
3. Overhead Ceiling-Mounted Racks for Long Materials and Clamps
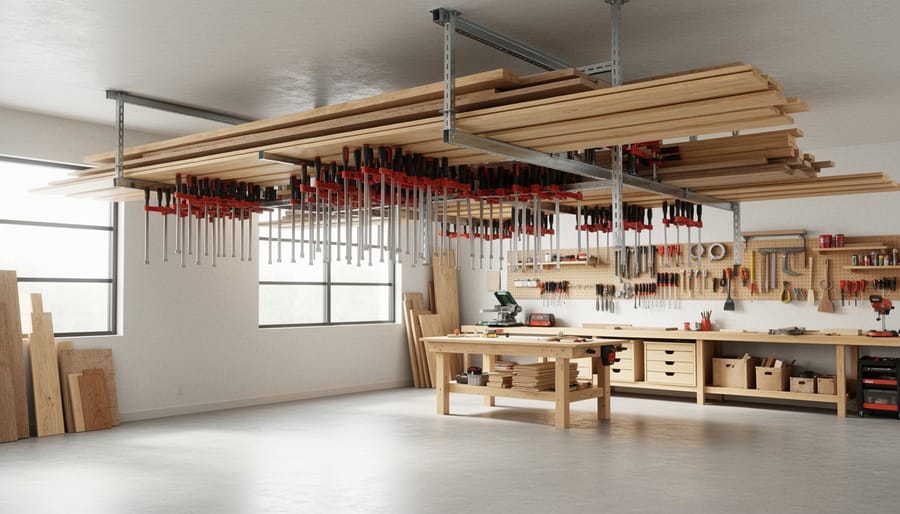
Ceiling-level storage transforms dead air space into a practical home for your longest, bulkiest items. This overhead zone (typically 7-8 feet high) is ideal for materials and essential workshop tools you don’t grab daily but still need within reach when projects demand them.
Start by locating your ceiling joists with a stud finder, marking their positions with painter’s tape. Proper joist anchoring is critical: a single joist can typically support 40-50 pounds when you use lag screws rated for structural loads. Space your mounting points 16-24 inches apart along the joist run, using 3/8-inch lag screws driven at least 2.5 inches into solid wood. For lumber racks, install paired brackets 4-6 feet apart to support boards up to 10 feet long without sagging.
The 7-foot height works well because it keeps materials completely out of your workflow zone while still letting you reach them with a stepstool. Mount simple L-brackets perpendicular to joists for dimensional lumber, keeping the lower edge at least 78 inches from the floor to prevent head strikes. For pipe clamps and levels, install horizontal rails or pegboard strips that angle items slightly downward for easy identification from below.
Consider dedicating separate zones at this level: lumber nearest your table saw, clamps above your assembly area, and extension cords near your primary outlets. This strategic placement cuts retrieval time and keeps your floor clear for active work. Plan 12-16 inches between storage rows to allow air circulation and prevent items from binding when you slide them in and out.
4. Mid-Level Open Shelving for Power Tools and Portable Equipment
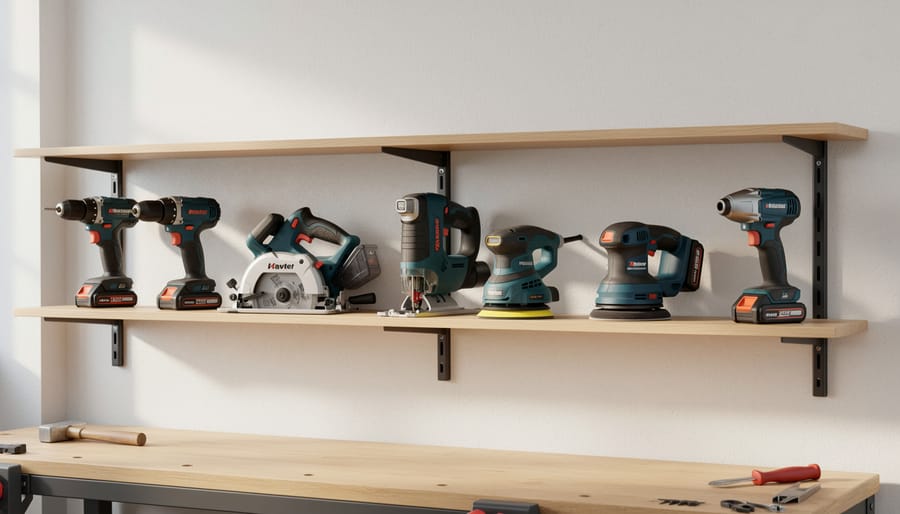
Mid-level shelving between 30 and 50 inches creates the ideal zone for your power tools. This height puts drills, sanders, and routers right at arm level when you’re standing, making them easy to grab without bending or stretching. You’re lifting from a natural position that doesn’t strain your back, even when handling heavier tools like a circular saw or jigsaw.
For shelf depth, aim for 12 to 16 inches. Most cordless drills and palm sanders fit comfortably on 12-inch shelves, while larger tools like belt sanders and routers need the full 16 inches. Measure your biggest tools first, then build accordingly. Shelves deeper than 16 inches can hold the tools, but you’ll end up reaching awkwardly toward the back wall.
You’ve got two main material choices. Three-quarter-inch plywood offers excellent strength and lets you cut custom widths to fit your space exactly. A 4×8 sheet runs around $45 and gives you enough material for four to six shelves, depending on width. Pre-made wire shelving units cost $60 to $120 and install faster, but they limit your layout options and can let smaller accessories fall through the gaps.
Organize your shelves by tool category. Put all drills and drivers on one shelf, sanders and grinders on another, saws on a third. This grouping makes it obvious when something’s missing and helps you develop muscle memory for where each tool lives. Store battery chargers on the same shelf as their matching tools so you’re not hunting around when batteries die.
Space shelves 14 to 18 inches apart vertically. This clearance accommodates most power tools while leaving room to lift them off without bumping the shelf above.
5. Floor-Level Rolling Cabinets for Heavy Equipment and Bulk Materials
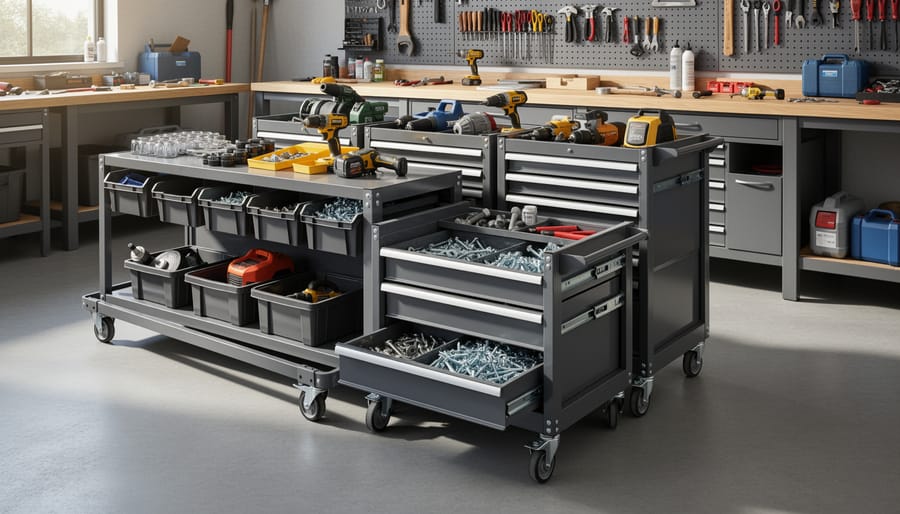
Floor-level storage solves the twin challenges of housing your heaviest equipment while keeping your workshop layout flexible. Rolling cabinets at 0-24 inches high create dedicated homes for table saws, thickness planers, belt sanders, and those bins of screws and hardware that seem to multiply on their own.
Start by assessing your heaviest gear. A full-size table saw or planer can weigh 200+ pounds, so you’ll need industrial-grade locking casters rated for at least 300 pounds each. Look for 3-inch diameter swivel casters with polyurethane wheels, they roll smoothly on concrete and won’t mark up finished floors. Install them on the corners of sturdy plywood platforms (¾-inch or double-layered ½-inch) that extend slightly beyond your tool’s footprint for stability.
For smaller equipment like sanders and routers, choose between drawer-style cabinets and open shelving units. Deep drawers (12-18 inches) work brilliantly for cordless tools and accessories, keeping them dust-free and organized by type. Open cabinets with adjustable shelves suit bulkier items and let you grab what you need at a glance. Mount magnetic strips inside cabinet doors for spare blades and bits.
The real advantage of floor-level mobility shows up when you reconfigure for different projects. Roll your table saw to the center for sheet goods, then tuck it against the wall for hand tool work. Cluster related cabinets together for assembly projects, then separate them when you need open floor space. Lock the casters during use to prevent drift, but you’ll appreciate the freedom to reshape your workshop in minutes rather than struggling with fixed layouts.
6. Tilted Mid-Level French Cleat System for Specialty Tools
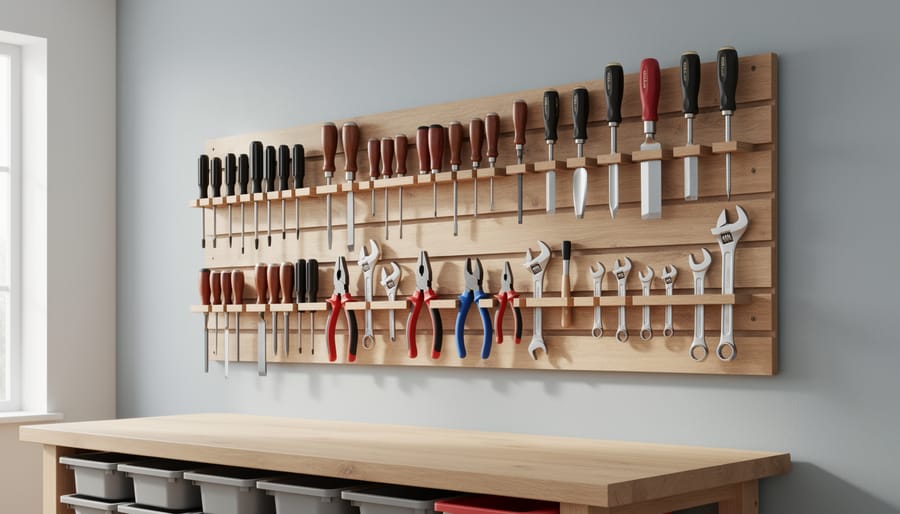
A French cleat system at mid-level height gives your specialty hand tools the visibility and accessibility they deserve. Installing cleats between 40 and 60 inches puts chisels, rasps, hand planes, and specialty saws right at eye level where you can quickly spot the exact tool you need without digging through drawers or shuffling through a toolbox.
The beauty of French cleats lies in their simplicity and adaptability. Cut matching 45-degree bevels on strips of 3/4-inch plywood or hardwood, then mount the wall cleat securely into studs across your workshop wall. Space your cleats 12 to 16 inches apart vertically to create multiple zones for different tool categories. This spacing gives you room to hang various holder sizes while maintaining the structural integrity needed for heavier specialty tools.
Creating custom tool holders from scrap wood takes the same approach you’d use when you build a workbench just on a smaller scale. Here’s the basic process:
- Cut wall cleats at 45 degrees with the bevel facing up, then secure them to studs with 3-inch screws
- Create matching hanging cleats with the bevel facing down to hook over the wall cleats
- Attach tool-specific holders to the hanging cleats using screws or glue
- Test each holder with its intended tool to verify weight capacity before loading your full collection
The real advantage comes from angling these holders slightly forward, tilting them 5 to 10 degrees toward you. This tilt makes tool identification instant because you see the full profile of each chisel, rasp, or saw at a glance instead of just the handle. Specialty tools like spokeshaves, card scrapers, and dovetail saws particularly benefit from this presentation since their unique shapes become immediately recognizable when displayed at this viewing angle.
7. Below-Bench Slide-Out Drawers for Small Parts and Fasteners
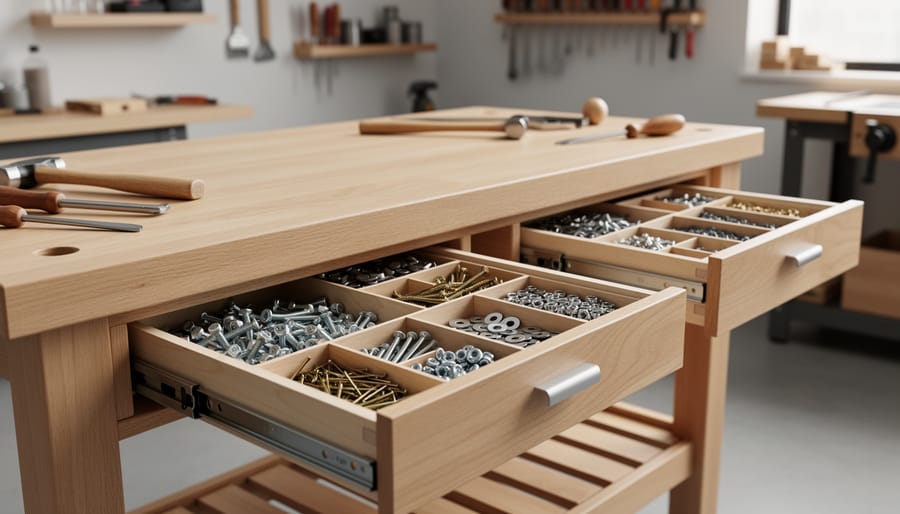
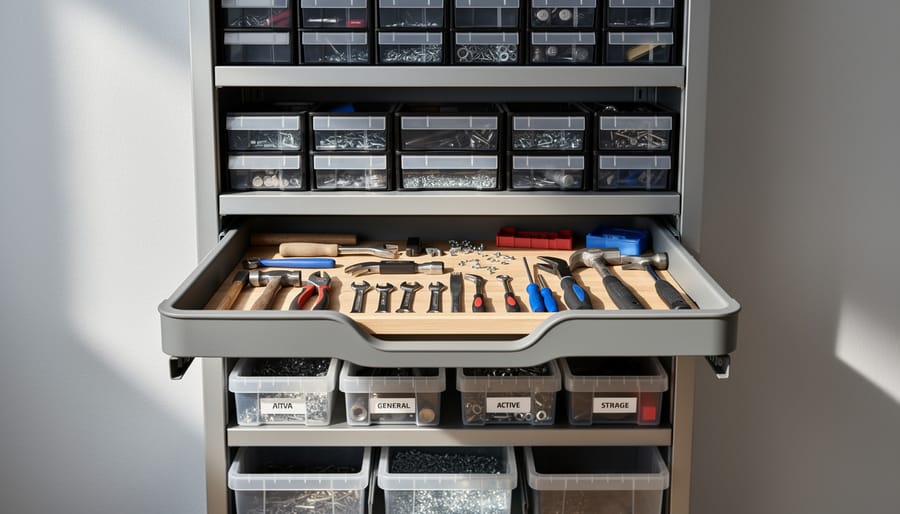
The space underneath your workbench is prime real estate you’re probably wasting. Installing shallow slide-out drawers in that 18-30 inch zone transforms dead air into organized storage for all the small items that usually clutter your workspace.
Build these drawers 3-6 inches deep, no more. Deeper drawers become black holes where hardware disappears. A 4-inch depth lets you see everything at a glance when you pull the drawer open, and smaller items won’t stack so high they create chaos. For a standard 24-inch deep bench, make your drawers 20-22 inches deep to allow clearance for the slides.
Use full-extension ball-bearing drawer slides rated for at least 75 pounds. They cost more than basic slides but let you access the entire drawer without bending down to dig around in the back. Mount them on the underside of your benchtop and to a simple frame you’ve built from 2x4s.
Inside each drawer, create dividers using thin plywood or hardboard strips. A grid system with 2-4 inch compartments works well for sorting screws by size, keeping different grits of sandpaper separate, and organizing finish applicators. Hot glue makes quick work of securing dividers in place.
Label each drawer front with a simple description or use clear-front drawers so you can identify contents without opening them. Group related items together: one drawer for screws and nails, another for abrasives, a third for measuring and marking supplies.
This low-level storage keeps hundreds of small parts organized without sacrificing an inch of your valuable benchtop workspace.
Putting Your Multi-Level Storage Plan into Action
You don’t need to tackle all seven levels at once. Pick the storage zone that solves your biggest pain point right now, if you’re constantly hunting for hand tools mid-project, start with that eye-level pegboard. If heavy equipment clutters your floor, build those rolling cabinets first. Once that initial level is working, you’ll see where the next organizational gap sits.
What level should I prioritize first?
Start with the level that addresses your most frequent frustration. If you waste time searching for everyday tools, begin with eye-level or waist-level storage for items you grab multiple times per session.
How do I decide which tools go where?
Match tool placement to how often you use it and how heavy it is. Daily-use hand tools belong at eye level, active project tools at waist height, and heavy equipment or rarely-used items go low or overhead.
Can I combine multiple level storage methods?
Absolutely, the seven ideas work together as a complete system. Most well-organized workshops use three to five different levels simultaneously to create zones for different tool types and usage patterns.
Give your system a month of real use before making permanent changes. You’ll quickly learn which tools you actually reach for and which heights feel most natural for your workflow. Effective level storage isn’t about following rigid rules, it’s about putting the tools you need most at the heights where you’ll actually use them. Adjust as you work, and your workshop will organize itself around how you build.
