Building a home office desk from scratch takes about 6 to 8 hours of active work and costs roughly $100 to $300 in materials, depending on your wood choice and size requirements. The process involves cutting a solid wood or plywood top to your desired dimensions, constructing a sturdy base frame, assembling the components, and finishing the surface for durability and aesthetics.
Creating your own desk gives you complete control over dimensions that actually fit your space, height that matches your ergonomic needs, and a design that reflects your personal style. Unlike mass-produced furniture that forces you to compromise, a custom-built desk can accommodate multiple monitors, provide exact legroom clearance, or include cable management features you actually need.
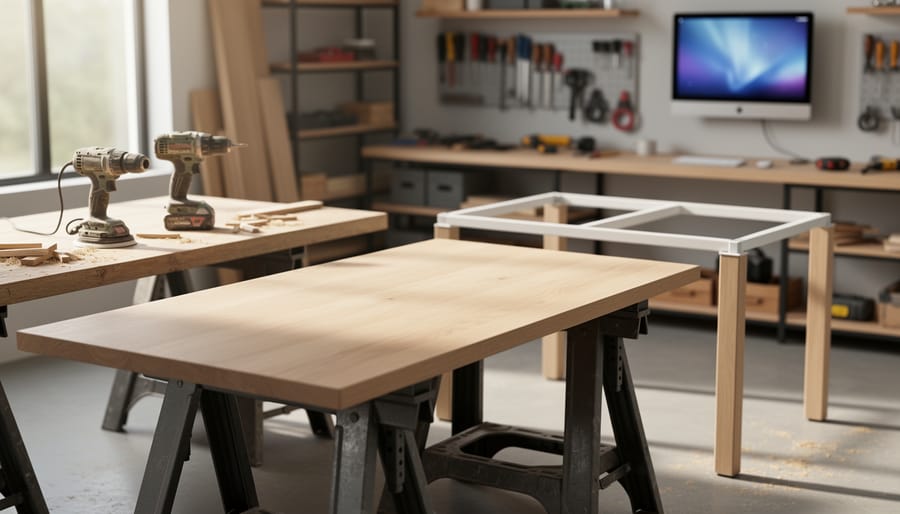
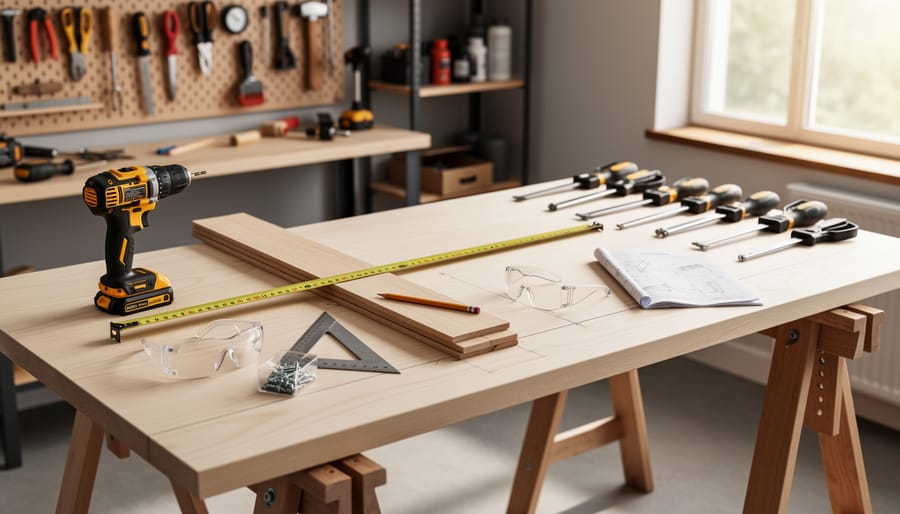
This project works well for beginners who have basic measuring and cutting skills. You’ll use common power tools like a circular saw or miter saw, a drill, and an orbital sander. The construction method relies on simple joinery techniques that don’t require advanced woodworking experience or specialized equipment. Most builders choose between a classic four-leg design or a modern trestle base, both of which offer excellent stability without complicated joints.
The beauty of this build is its flexibility. Start with a straightforward rectangular top and basic frame, then add drawers, keyboard trays, or built-in shelving as your confidence grows. You’re not just following a rigid plan but learning fundamental skills you can apply to future furniture projects while solving an immediate workspace problem.
Planning Your Desk Build
Before you pick up a single tool, take time to map out your desk build on paper. This planning stage prevents costly mistakes and ensures you create a desk that truly fits your space and work style.
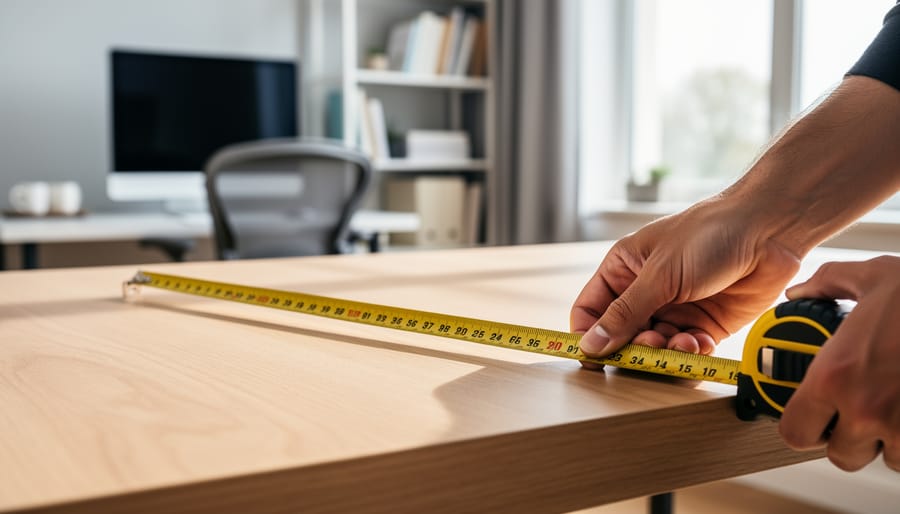
Start by measuring your available workspace. Note the wall length, the depth you can spare without blocking pathways, and any obstacles like outlets, vents, or windows. A standard desk runs 48 to 72 inches wide and 24 to 30 inches deep, but your space might call for something different. Write down these measurements and keep them handy.
Think about how you work daily. Do you need room for dual monitors, a laptop dock, and stacks of paperwork? Or are you a minimalist with just a laptop and a notebook? Your work habits should drive your desk dimensions. Someone doing graphic design needs more surface area than someone who primarily takes video calls.
Now choose a desk style that matches your needs and skill level. A simple rectangular workbench with four legs is the easiest starting point for beginners and works beautifully for most setups. An L-shaped desk maximizes corner space and gives you separate zones for computer work and paperwork, though it requires more materials and a bit more planning for the corner join. If you spend long hours at your desk, consider building with the option to add adjustable legs later for a standing desk conversion.
Sketch your design, even if you’re not an artist. Draw a top view showing length and width, then a side view with the height and leg placement. Mark where supports will go and note all dimensions directly on the sketch. This rough drawing becomes your roadmap during the build and helps you calculate exactly how much lumber you need. Keep it simple: straight lines, labeled measurements, and clear notes about each component beat a fancy drawing every time.
Tools and Materials You’ll Need
Choosing the Right Wood
Picking the right wood for your desk doesn’t have to be overwhelming. Let’s break down your options so you can choose materials that fit your budget and skill level.
For the desktop, you’ve got three solid choices. Pine is your wallet-friendly option at around $30-50 for enough material. It’s soft, which makes it easy to cut and sand, but it dents more easily than harder woods. If you’re just starting out, pine is forgiving and looks great with a simple stain or paint finish.
Birch plywood offers a middle ground at $50-80 for a sheet. It’s stronger than pine, gives you a smooth surface right away, and won’t warp like solid boards sometimes do. The downside? You’ll see plywood edges unless you add trim, but that’s a quick fix with iron-on edge banding or thin strips of solid wood.
Hardwoods like oak or maple create stunning, durable desktops that’ll last decades. Expect to spend $100-200, and know that these woods are tougher to cut and sand. They’re absolutely worth it if you want an heirloom piece, but they demand sharper tools and more patience.
For the legs and frame, stick with construction-grade lumber like 2x4s or 4x4s regardless of your desktop choice. They’re affordable, strong, and much easier to work with than hardwoods for structural components. You can always paint them to match your desktop or leave them natural for a modern farmhouse look.
Safety First: Workshop Safety Essentials
Before you make your first cut or drive your first screw, let’s talk about keeping yourself safe. Workshop safety isn’t about being paranoid, it’s about building good habits that let you enjoy woodworking for years to come. Think of safety gear and smart practices as part of your toolkit, just as essential as your saw or drill.
Gear Up: Your Essential Protection
Safety glasses are non-negotiable every single time you pick up a tool. Wood chips, sawdust, and the occasional flying screw fragment don’t care if you’re only making “one quick cut.” Get a pair that fits comfortably so you’ll actually wear them. For power tools like circular saws and sanders, add hearing protection, foam earplugs work fine, though over-ear muffs are more comfortable for longer sessions. A dust mask or respirator protects your lungs from fine sawdust, especially when sanding. The N95 masks many of us have now work well for this.
Safe Tool Habits
Read the manual for each power tool before using it, even if you think you know how it works. Keep your workspace well-lit so you can see what you’re cutting clearly, and never operate tools when you’re tired or distracted. Unplug tools when changing blades or bits, this simple habit prevents accidental starts that cause serious injuries.
Organize to Prevent Accidents
A cluttered workspace is a dangerous one. Keep your floor clear of scrap wood and cords that could trip you while carrying materials. Store tools properly after use rather than leaving them scattered across your work surface. Give yourself enough space around each tool to work comfortably without bumping into things or working in awkward positions that compromise control.
Step-by-Step: Building Your Home Office Desk
Step 1: Cut Your Materials to Size
Cutting your materials accurately sets the foundation for a desk that fits together properly and looks professional. Start by laying out all your lumber and marking each piece with its final dimension and purpose (desktop, legs, aprons, etc.) using a pencil and combination square.
Measure twice, cut once isn’t just a cliché, it genuinely saves time and materials. For each piece, measure from the factory edge of your lumber (the straight, clean edge it came with) and mark your cut line clearly. Use a speed square or straightedge to extend that mark across the entire width of the board so your saw has a clear path to follow.
When cutting, support both sides of your workpiece to prevent the wood from binding or splintering as the cut completes. A couple of sawhorses work perfectly. Let the saw do the work rather than forcing it through, and stay slightly on the waste side of your line, you can always sand or trim a bit more off, but you can’t add material back.
After cutting each piece, label it immediately with painter’s tape noting what it is. This simple step prevents mix-ups during assembly and keeps your build moving smoothly.
Step 2: Prepare and Assemble the Desktop
If you’re using a single plywood sheet, you’re in luck, just sand the edges smooth and you’re ready to move on. But if you’re joining solid wood boards edge-to-edge for a custom look, here’s how to get a seamless desktop.
Start by arranging your boards side-by-side on a flat surface. Alternate the growth ring direction (check the end grain) to minimize warping as the wood adjusts to your home’s humidity. Mark the best-looking faces to go on top.
Apply a thin, even bead of wood glue along one edge. Press the boards together, making sure the top faces align as perfectly as possible. Don’t worry about small gaps at the bottom, you’ll plane or sand those later.
Now clamp the boards together, placing clamps every 12 to 18 inches, alternating above and below to distribute pressure evenly. Tighten until you see a tiny bit of glue squeeze out, but don’t overtighten or you’ll create a dip. Use scrap wood between the clamps and your boards to prevent dents.
Wipe away excess glue with a damp cloth before it dries. Let everything cure overnight before removing the clamps, patience here prevents weak joints later.
Step 3: Build the Desk Frame and Legs
Start by deciding on your leg configuration. Four legs at each corner is simplest and plenty strong for most desks. Cut four legs to your desired height minus the desktop thickness, typically 28 to 29 inches for standard desk height.
For the frame, you’ll create a rectangular support that connects the legs. Cut two long apron boards to run along the desk’s length and two shorter ones for the width. These should fit flush between the legs.
The easiest assembly method uses pocket hole screws. Drill pocket holes on the inside faces of your apron boards using a pocket hole jig, then attach them to the legs with 2.5-inch coarse-thread screws. If you don’t have a jig, use corner braces from the hardware store, just predrill to prevent splitting and attach with 1.5-inch screws.
Work on a flat surface and check that everything is square before tightening fully. A carpenter’s square helps confirm your corners are 90 degrees. Add diagonal bracing across opposite corners underneath for extra rigidity if your desk will support heavy equipment.
Step 4: Attach the Desktop to the Base
With your desktop and base complete, it’s time to bring them together. This step is crucial for long-term stability, so don’t rush it.
Position the desktop upside down on a clean, padded surface. Center your frame on the underside, ensuring equal overhang on all sides. Use a measuring tape to verify, this matters for both looks and balance.
For solid wood tops, attach the base using figure-eight fasteners or metal desktop clips. These allow the wood to expand and contract with humidity changes, preventing cracks. Install them every 12 inches along the frame rails, screwing into pre-drilled pilot holes in the frame while leaving the desktop side slightly loose.
If you’re working with plywood, which moves less, you can use wood screws directly through corner braces or pocket holes. Drive screws from underneath the frame into the desktop, stopping just before they break through the surface.
Before flipping the desk upright, give everything a final shake test. Tighten any loose connections, then carefully turn it over with a helper if it’s heavy.
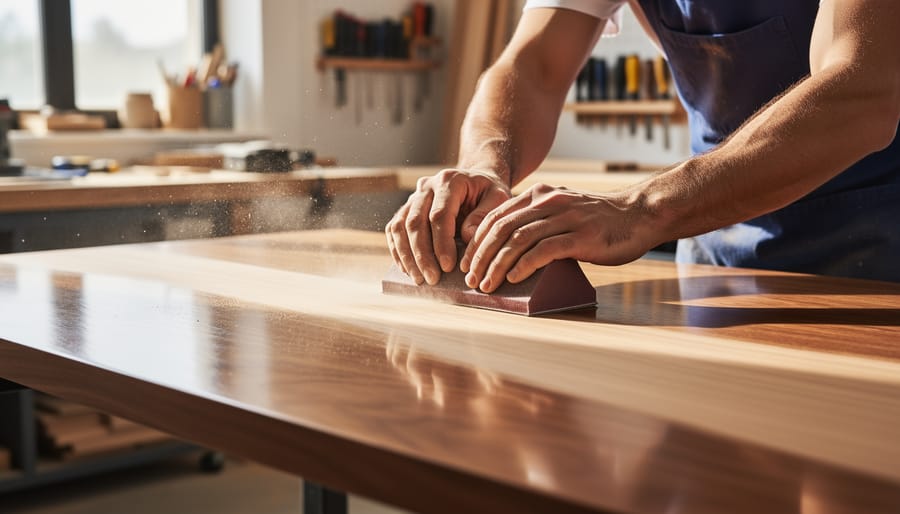
Step 5: Sand and Finish
Start sanding with 80-grit sandpaper to smooth any rough spots and remove pencil marks. Work your way up to 120-grit, then finish with 180-grit for a silky surface. Always sand in the direction of the wood grain to avoid scratches. Pay extra attention to edges and corners where you’ll rest your arms.
Wipe the entire desk with a damp cloth to remove all dust before finishing. Let it dry completely.
For finishing, you have several beginner-friendly options. Polyurethane provides excellent protection and is forgiving to apply. Use a natural bristle brush and apply thin coats, sanding lightly with 220-grit between coats. Stain followed by polyurethane adds color while showcasing the wood grain. Apply stain with a cloth, wipe off excess after a few minutes, then seal with polyurethane once dry.
If you prefer a natural look, Danish oil or tung oil are easy to apply with a rag and bring out the wood’s character without looking plasticky.
Apply at least two coats of any finish, allowing proper drying time between each. Three coats on the desktop ensures long-lasting durability.
Testing and Verifying Your Build
Before you load up your new desk with monitors and keyboards, you need to make sure it’s actually safe and stable. This verification step only takes about 15 minutes, but it’ll save you from a potential disaster down the road.
Start with the wobble test. Place both hands on opposite corners of the desktop and apply gentle downward pressure, then try to rock the desk side to side and front to back. A well-built desk should feel solid with minimal movement. If you notice wobbling, flip the desk over and check that all leg assemblies are tight and that the legs themselves are making full contact with the floor. Sometimes a slightly uneven floor is the culprit, not your build.
Next, verify the desk is level. Place a spirit level across the desktop in multiple directions. If you spot high or low spots, you can slip furniture pads or shims under the appropriate legs to compensate. Don’t skip this step because an unlevel desk will make your coffee slide across the surface and drive you nuts during Zoom calls.
Test the weight capacity by gradually loading the desk with books, toolboxes, or other heavy items until you reach your expected working load (typically 50-100 pounds for a basic home office setup). Watch for sagging, creaking, or any movement in the joints. Leave the weight on for an hour, then check again to ensure nothing has shifted or loosened.
Run your hand along all edges and the underside of the desktop to check for splinters or rough spots you missed during sanding. Pay special attention to corners and anywhere you made cuts. A quick pass with 220-grit sandpaper will smooth out any problem areas.
Finally, inspect every screw, bolt, and joint connection. Give each fastener a final tightening with your drill or screwdriver. Check that pocket hole screws are flush and that no sharp screw points are sticking through anywhere they could scratch you or snag clothing.
If you find uneven legs that won’t stabilize with shims, you may need to trim the long leg slightly with a saw. Mark the amount to remove carefully, make the cut, then sand the end smooth before retesting. For minor surface imperfections like small dents or scratches, you can often sand them out and reapply finish to that spot, feathering the edges so it blends in.
Customization Ideas and Next Steps
Now that you’ve built a solid, functional desk, you can enhance it to perfectly match your workflow and style. These upgrades range from simple add-ons to more advanced projects that’ll help you grow your woodworking skills.
Cable management makes an immediate difference in both appearance and functionality. Drill a grommet hole in the back corner of your desktop for routing cables, or attach a wire basket underneath to corral power strips and excess cords. You can build a simple cable tray from scrap wood in about 20 minutes.
A keyboard tray mounted on drawer slides creates extra desktop space and improves ergonomics. This project introduces you to working with sliding hardware, a useful skill for future builds. Similarly, adding a monitor stand raises your screen to eye level while freeing up desk real estate. Build one from leftover lumber using the same joinery techniques you practiced on the desk frame.
For storage, side-mounted drawers or a simple cubby shelf unit attached to one end transforms your desk into a complete workstation. These projects let you practice more advanced joinery like dovetails or dado grooves if you’re ready to level up.
Consider finishing touches like edge banding on plywood, decorative corner braces, or a contrasting stain on the base versus the top. Each customization teaches new techniques and makes the desk uniquely yours.
Ready to tackle more ambitious furniture projects? Our skill-building courses walk you through advanced joinery, drawer construction, and finish application techniques that’ll take your woodworking to the next level.

Common Questions About Building a Home Office Desk
Building a home office desk is an exciting project, but it’s natural to have questions before you start. Here are answers to the most common concerns we hear from first-time desk builders.
How much does it cost to build a home office desk?
A basic desk typically costs between $75 and $200 in materials, depending on your wood choice and size. Pine and plywood keep costs lower, while hardwoods increase the budget but offer greater durability.
How long does it take to build a desk from scratch?
Most beginners complete a simple desk in 6 to 10 hours spread over a weekend. Your first build takes longer as you learn, but the process gets faster with experience.
Can I build a desk without expensive power tools?
Yes, though it requires more time and effort. You can have lumber cut at the hardware store and assemble using a hand drill, hand saw, and basic fasteners, making the project accessible with minimal equipment.
What if I make a mistake during the build?
Most mistakes are fixable. Wrong measurements can often be adjusted by trimming or adding material, gaps can be filled with wood filler, and surface errors disappear with sanding and finishing.
Remember that every experienced woodworker started as a beginner and made plenty of mistakes along the way. The beauty of building your own desk is that minor imperfections add character and tell the story of your learning process. If a step goes wrong, take a breath, assess what happened, and work through the solution methodically. Keep extra materials on hand for practice cuts, and don’t hesitate to ask for advice at your local hardware store. The staff there have seen every possible building challenge and can offer practical solutions. Your first desk might not be perfect, but it will be yours, and the skills you gain will make your next project even better.
Congratulations! You’ve just built a custom home office desk that’s uniquely yours. Whether you’re tightening those final screws or still gathering your materials, you’ve taken a meaningful step toward becoming a more confident furniture maker.
Remember, every woodworker started exactly where you are now. Your first build might have a few quirks or imperfections, and that’s perfectly normal. Those little challenges you overcame while measuring, cutting, and assembling taught you skills you’ll carry into every future project. Each desk, shelf, or table you create will be easier and more polished than the last.
We’d love to see what you’ve created! Your build might inspire someone else to start their own woodworking journey. And if you caught the building bug, don’t stop here. Our site offers step-by-step tutorials for other furniture projects and skill-building courses designed to take you from beginner basics to advanced techniques at your own pace.
Your workspace is now truly your own creation. Enjoy every moment you spend at your handmade desk, knowing you built something functional, personal, and built to last.
