

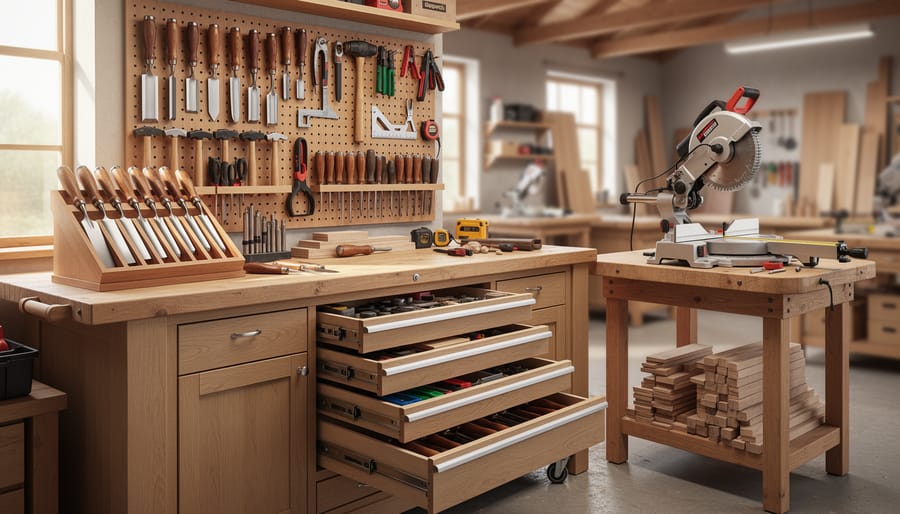
A cluttered workshop with scattered tools wastes your time and kills your momentum when you’re in the middle of a project. The seven essential tool storage methods covered here give you specific, proven systems to organize everything from hand tools to power equipment, so you can find what you need in seconds and get back to building. Whether you’re working with a single wall in a garage or a full dedicated shop, these storage solutions range from simple pegboard setups to rolling cabinets, each designed to match different tool collections and workspace layouts.
You don’t need to buy expensive custom systems or master complicated builds to transform your space. Most of these methods use readily available materials and can be set up in an afternoon. The key is matching the right storage type to your specific tools and how you actually work. A miter saw station serves different needs than drawer organizers for chisels, and knowing which method fits your situation prevents the frustration of buying storage that doesn’t solve your real problem.
This guide walks you through each of the seven storage approaches with enough detail to choose confidently and implement quickly. You’ll see how workshop level storage principles apply to vertical walls, horizontal benchtops, and mobile solutions. By the end, you’ll have a clear plan for organizing your tools in a way that actually sticks, not just another temporary cleanup that falls apart after a week.
Why Tool Storage Matters in Your Workshop
Good tool storage isn’t just about keeping your workshop tidy, it directly impacts every project you tackle. When each tool has a designated home, you’ll spend less time searching and more time building. That efficiency adds up quickly across multiple projects.
Organized storage also protects your investment. Tools left scattered on workbenches or tossed into drawers get dull, damaged, or covered in sawdust. A proper storage system keeps cutting edges sharp, prevents rust, and ensures your measuring tools maintain their accuracy.
Safety improves dramatically with thoughtful storage. Sharp chisels, spinning router bits, and heavy mallets pose real risks when left out. Many woodworkers find that implementing 5S tool organization principles transforms not just their workspace, but their entire approach to projects.
Whether you’re just starting out or you’ve been woodworking for years, better storage makes the craft more enjoyable. You’ll feel less frustrated, work more confidently, and actually want to spend time in your workshop.
How We Chose These Seven Storage Methods
We picked these seven storage methods based on what actually works for real woodworkers, not just what looks good in magazines. Each one handles different workshop sizes, whether you’re in a basement corner or a two-car garage. They’re budget-friendly enough that you won’t need to skip buying tools to afford storage. Most importantly, you can build or install them yourself with basic skills.
We focused on methods that store the tools you’ll use most: hand tools, power tools, measuring equipment, and fasteners. Some excel at quick access, while others maximize vertical space or keep you mobile. The beauty is that you don’t have to choose just one. Mix a pegboard with drawer organizers, or combine overhead storage with rolling carts. Start with whatever solves your biggest frustration right now, then add more as your workshop evolves.
1. Wall-Mounted Pegboard Systems
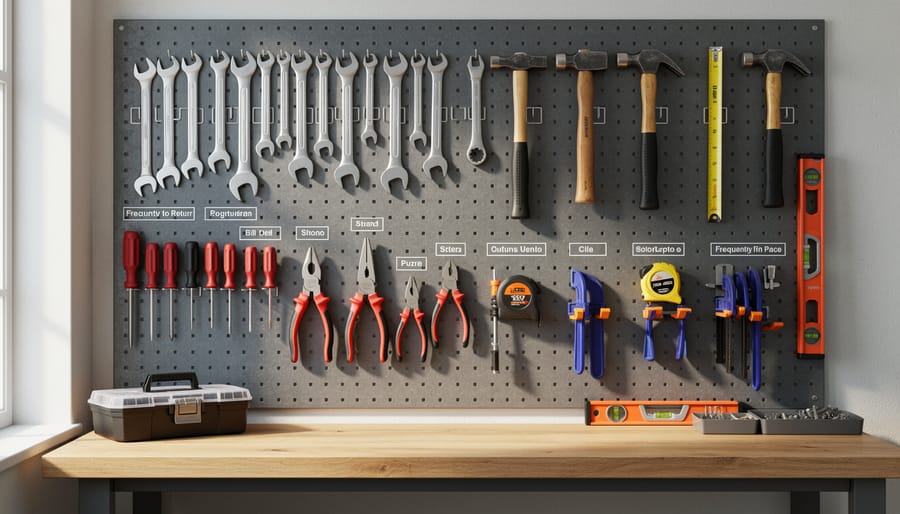
Pegboard is essentially a thin sheet of hardboard or metal perforated with evenly-spaced holes, and it’s been a workshop staple for decades because it just works. The system is simple: you hang the board on your wall with spacers behind it, then slot metal hooks into the holes wherever you need them. What makes pegboard so beloved among woodworkers is its flexibility, you can rearrange your entire tool layout in minutes without drilling new holes or creating wall damage.
This system shines for hand tools and smaller equipment. Your hammers, screwdrivers, chisels, hand saws, and measuring tapes all have a natural home on pegboard. Clamps are perfect candidates too, especially smaller bar clamps and spring clamps that tend to pile up in messy heaps otherwise. Layout squares, levels, and marking gauges hang beautifully and stay within easy reach when you’re setting up cuts.
Installing pegboard properly makes all the difference. You’ll need to mount it with furring strips or spacers behind it, typically 3/4-inch blocks, so the hooks have room to insert and lock into place. Screw the board directly into wall studs for a secure hold that won’t sag under weight. Here are essential tips for a pegboard setup that lasts:
- Locate studs and mount directly to them with screws every 16 inches for maximum strength
- Buy pegboard hooks in multiple sizes and styles, straight hooks, double hooks, and bin holders give you options
- Trace around each tool with a permanent marker so you know exactly where it belongs
- Leave empty holes between tools to accommodate new additions and seasonal rearrangements
The marker outlines might seem fussy at first, but they’re genuinely helpful. You’ll spot missing tools instantly and maintain your layout even when someone else uses your workshop.
For hook selection, don’t cheap out on flimsy wire versions. Metal pegboard hooks with locking mechanisms or plastic safety collars prevent tools from falling when you bump the board. Match hook depth to tool weight, heavier items like mallets need deeper, sturdier hooks than tape measures.
2. Rolling Tool Carts and Cabinets
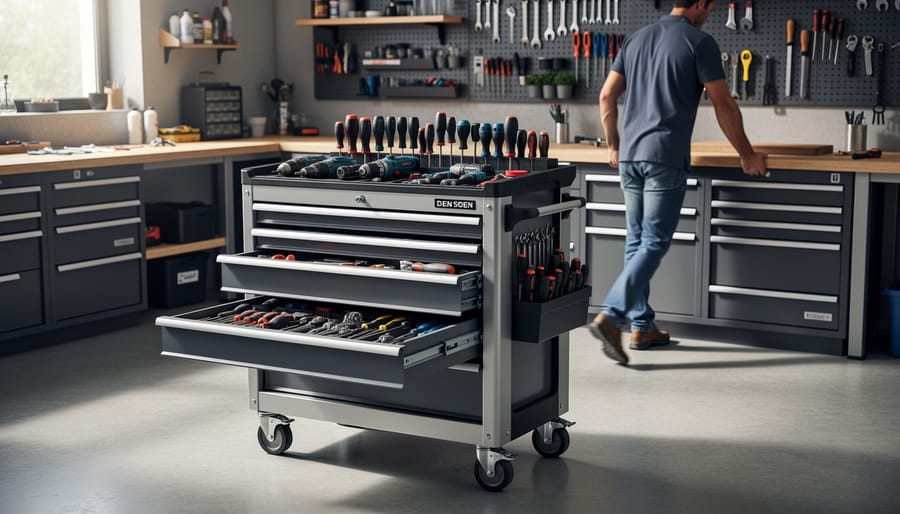
Rolling tool carts bring your workspace to the project instead of hauling tools back and forth. If your workshop pulls double duty as a garage or storage room, wheeled storage lets you reclaim floor space when you’re not actively building.
The real advantage shows up when you’re working on larger projects. Roll your cart next to your assembly table with everything you need within arm’s reach, chisels, measuring tape, layout tools, and that one specialty bit you always misplace. No more walking loops around the shop while glue dries or finishes cure.
For rolling storage, prioritize tools you grab constantly: cordless drills, sanders, basic hand planes, squares, and marking gauges. Many woodworkers dedicate one cart to finishing supplies (brushes, rags, stains) and another to joinery tools. Project-specific setups work brilliantly too. Load up everything for dovetail work or router operations, then wheel the whole station to your bench.
Look for carts with locking casters, all four wheels, not just two. You want stability when you’re actually using tools off the cart surface. Drawers beat open shelves for small items that vibrate off during movement. Soft-close drawer slides might seem fancy, but they prevent rattling and protect edge tools from jostling together.
Building your own cart costs less than buying. Start with a simple plywood box on heavy-duty casters, add a butcher block top, and install basic drawer slides. You can customize heights to fit under your workbench and widths to squeeze through your shop’s tightest passages. A weekend project creates storage that fits your exact tools and workflow.
3. French Cleat Tool Wall
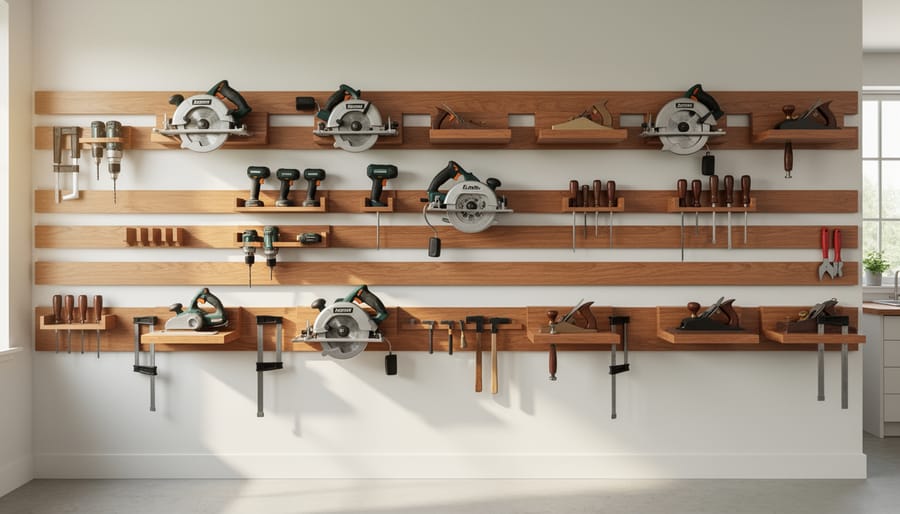
A French cleat system transforms a bare wall into a heavy-duty, endlessly customizable storage solution. If you’ve never seen one in action, the concept is brilliantly simple: two matching boards with 45-degree beveled edges that interlock when hung. One cleat mounts horizontally to your wall, while the other attaches to your tool holder. When you hang the tool holder’s cleat onto the wall cleat, gravity locks them together in a rock-solid grip.
What makes this system so popular among woodworkers is its flexibility. You can rearrange your entire tool wall in minutes without drilling new holes or leaving behind a constellation of patched screw holes. Your miter saw might live in one spot during cabinet season, then slide three feet over when you’re building outdoor furniture and need that space for clamps. As your tool collection grows, you simply build another holder and hang it wherever makes sense.
French cleats excel at organizing power tools and bulky equipment that would overwhelm pegboard hooks. Your circular saw, router, belt sander, and cordless drill collection all get dedicated homes that keep them visible and accessible. The system handles weight that would rip pegboard right off the wall.
Building custom holders is straightforward woodworking. You’ll cut matching 45-degree bevels on two strips of plywood or solid wood, mount one strip to the wall, and attach the other to a simple plywood platform or custom-shaped holder. For a cordless drill holder, you might create a shelf with circular cutouts. For a circular saw, a horizontal platform with a lip works perfectly. The beauty is that each holder can be exactly what that specific tool needs, and you’re never locked into a fixed configuration.
4. Drawer Organizers and Foam Inserts
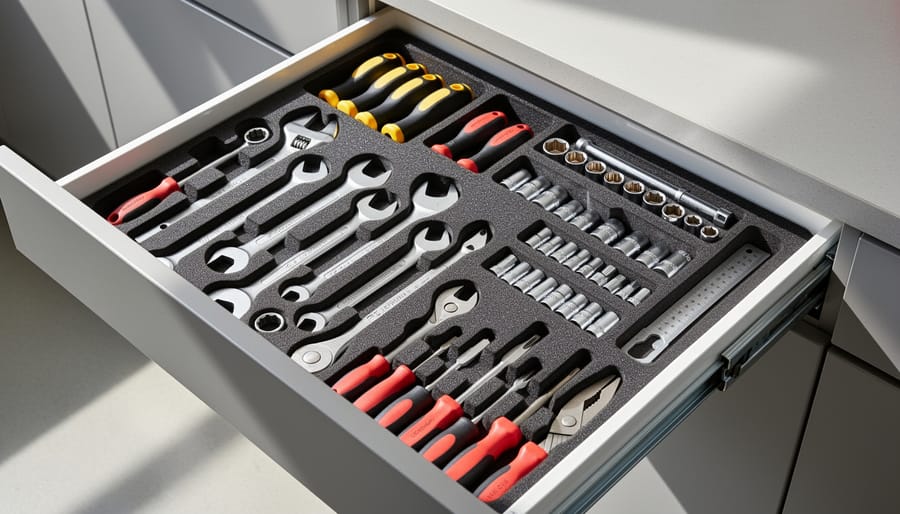
Drawers keep small tools protected from dust and damage while organizing them right at your fingertips. Unlike open storage where bits and fasteners disappear into jumbled piles, drawer systems give each item a designated spot you can find without digging.
The best candidates for drawer storage are tools you reach for regularly but that would create visual clutter on walls:
- Drill bits and driver bit sets
- Router bits and bearing sets
- Chisels and carving tools
- Screwdriver sets and hex keys
- Measuring devices like calipers and gauges
- Specialty fasteners sorted by size and type
Foam inserts transform basic drawers into custom-fitted storage that holds tools securely in place. When you open the drawer, you see every tool at a glance and immediately notice if something’s missing. The foam also cushions sharp edges and prevents tools from knocking against each other.
You can buy pre-cut foam inserts, but making your own costs less and fits your exact collection. Start with two-layer foam from a hardware store. Trace your tools on the top layer, then cut out the shapes with a sharp utility knife or hot wire cutter. The colored bottom layer creates contrast so empty spots stand out visually.
If foam feels like overkill for your budget, simple drawer dividers work beautifully too. Adjustable plastic dividers let you create custom compartments that shift as your collection grows. For an even cheaper option, cut scrap wood into strips and build your own grid system that fits snugly in the drawer.
The key is committing to one organizational system and maintaining it. When every drill bit has its home, you’ll stop buying duplicates and spend more time building.
5. Overhead Ceiling Storage
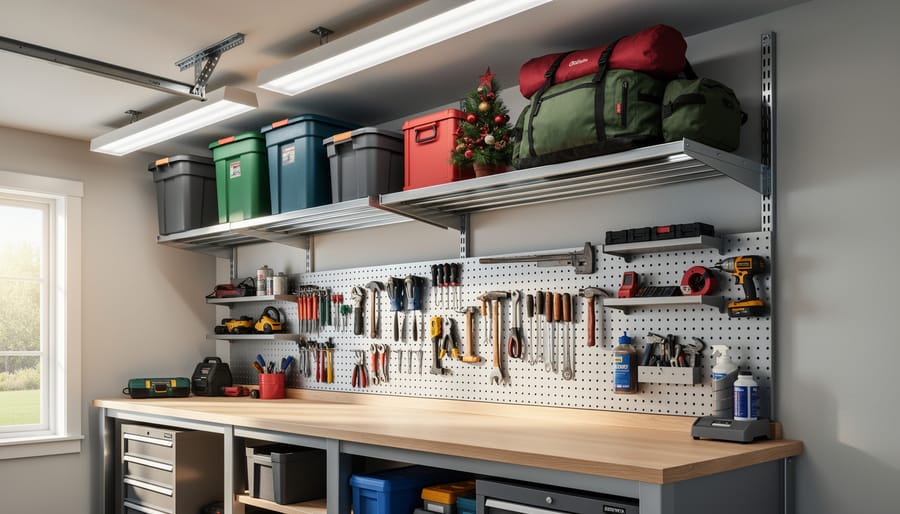
Look up, and you might find the perfect spot for those bulky items eating up precious floor space. Overhead ceiling storage transforms unused vertical space into practical home for clamp collections, extra lumber, seasonal equipment, and tools you reach for only occasionally.
The beauty of ceiling storage lies in getting rarely-used items completely out of your way while keeping them protected and accessible when needed. Long pipe clamps, extension cords, and backup sanding belts fit perfectly overhead. Stock pieces of plywood or dimensional lumber can rest on horizontal racks, freeing up wall space for more frequently accessed tools.
Weight capacity matters tremendously with overhead systems. Most DIY-installed ceiling racks safely handle 50-100 pounds when properly secured to joists, but that limit drops dramatically with poor installation. Space your mounting points no more than 24 inches apart, and use appropriately rated hardware for your specific load.
Simple overhead rack systems work brilliantly for DIY installation. You can build basic lumber racks with 2x4s secured to joists, creating horizontal slots for sheet goods and long boards. Metal wire shelving units designed for garage ceilings offer adjustable configurations and excellent visibility of stored items.
Keep accessibility realistic. If you need a ladder every time you retrieve something, that storage spot works only for true occasional-use items. Position your overhead racks so you can reach them with a small step stool rather than hauling out the extension ladder for routine access.
6. Magnetic Tool Strips and Holders
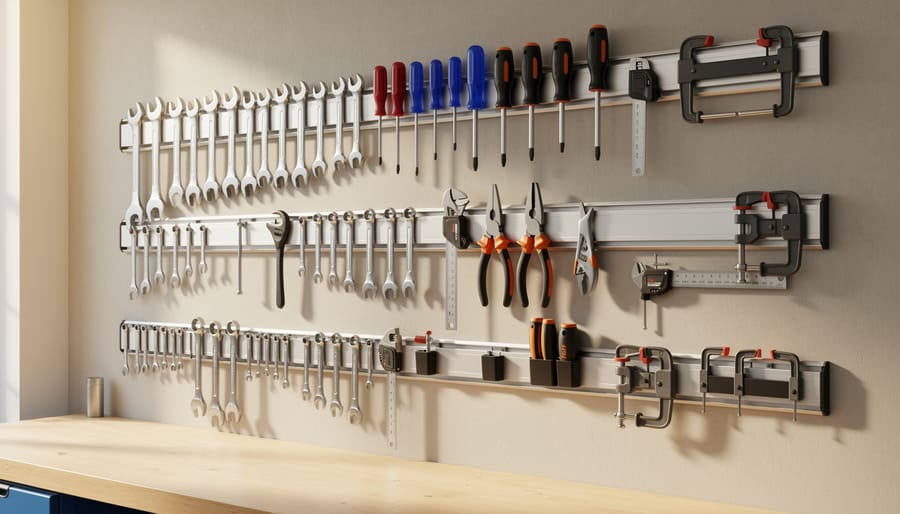
Magnetic strips transform narrow wall spaces into instant storage that keeps frequently grabbed tools visible and within arm’s reach. A strong magnetic bar mounted above your workbench or beside a drill press holds screwdrivers, wrenches, pliers, and metal-handled chisels so you’re not digging through drawers mid-project.
The key is matching strip strength to tool weight. Lightweight magnetic strips work fine for Allen keys and small screwdrivers, but you’ll need heavy-duty rare-earth magnet strips for larger wrenches and hammers. Mount strips at comfortable reaching height near where you actually use the tools, one above your assembly bench for hand tools, another by your table saw for wrenches and push sticks.
The visual advantage matters more than you’d think. When every screwdriver hangs in plain view, you immediately spot the missing Phillips head instead of assuming it’s buried somewhere. This same principle applies when you choose power tools and accessories, visible organization prevents duplicate purchases.
Install magnetic strips in dead zones: that four-inch gap between your workbench and wall, the side of a cabinet, or vertically on exposed studs. A few strategically placed strips cost under twenty dollars but eliminate the frustrating hunt for that one specific tool you need right now.
7. Mobile Work Stations with Integrated Storage
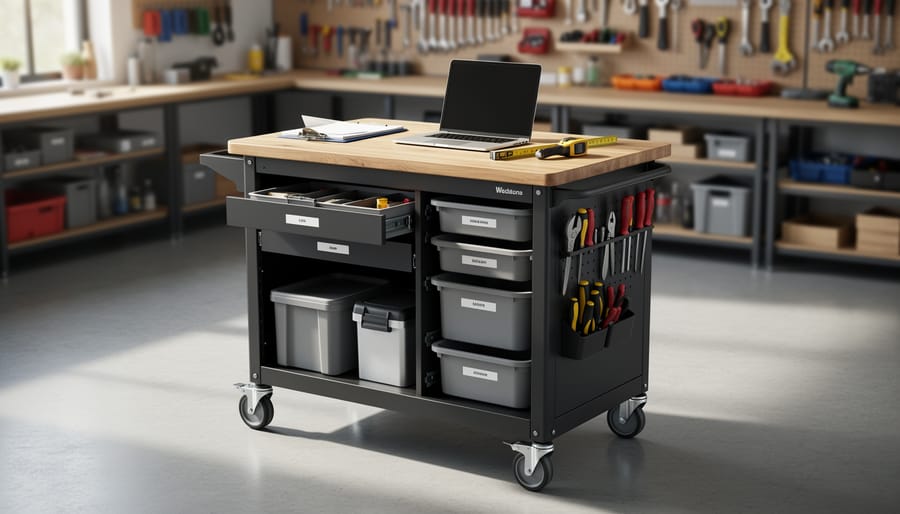
Mobile workstations solve two problems at once: they give you a proper work surface and keep essential tools within arm’s reach. Think of a miter saw stand with built-in shelves underneath, or an assembly table with shallow drawers for layout tools, squares, and pencils. These pieces keep your most-used items right where you need them, eliminating trips across the shop mid-project.
The mobility factor makes these stations particularly valuable in small workshops or shared garage spaces. You can roll a complete workstation to the center of your shop for a project, then tuck it against a wall when you’re done. No permanent floor space commitment required.
For miter saw stations, consider adding cubbies on each side for stop blocks, push sticks, and measuring tapes. The wings that support long boards can double as shallow shelving. Assembly tables work well with tool drawers on one end and clamp storage hooks on the sides, keeping everything you need for glue-ups in one mobile unit.
Building your own mobile workstation lets you customize compartments for your specific tools. Start with a sturdy base on locking casters (minimum three-inch wheels for smooth rolling). Add a work surface at comfortable working height, typically 34 to 36 inches. Then design storage around your workflow: shallow drawers for hand tools, vertical dividers for saw blades, and open shelves for bulkier items like sanders or nail guns.
The key is thinking through which tools you use together. Group fasteners with your drill driver, finishing supplies with sanders, and layout tools with your squares and pencils. When everything lives on the same mobile station, you’ll spend more time building and less time hunting.
Mixing Methods for Your Perfect Workshop Setup
You don’t need to pick just one storage method and stick with it. The most functional workshops combine several approaches based on how tools are actually used.
Start by grouping your tools by frequency of use. Daily-reach items like tape measures, pencils, and commonly used hand tools work perfectly on pegboard or magnetic strips right at your workbench. Medium-frequency tools can live in drawer organizers or on French cleats. Seasonal or specialty equipment belongs overhead or in rolling cabinets tucked away until needed.
A popular combination pairs pegboard with drawer organizers. The pegboard handles items you grab multiple times per session, while drawers keep bits, blades, and fasteners organized but protected from dust. Another effective pairing uses French cleats for power tools you want easily swappable, combined with a rolling cart that moves project-specific tools wherever you’re working.
Don’t feel pressure to overhaul everything at once. Choose the storage method that solves your biggest current frustration, whether that’s tripping over floor clutter or wasting time hunting for drill bits. Install that system, live with it for a few weeks, then add another method where you notice gaps. Your perfect setup will emerge naturally as your workshop evolves.
Common Tool Storage Questions
How do I decide which storage method to start with?
Begin by evaluating which tools you use most frequently and where you need them accessible. If you’re constantly hunting for hand tools, start with a pegboard or magnetic strip. For those with limited floor space, wall-mounted or overhead solutions offer the biggest impact first.
What’s the most budget-friendly storage option?
Pegboard systems and magnetic strips are the most affordable starting points, often costing under $50 for a basic setup. You can also build a simple French cleat system from scrap lumber, making it essentially free if you already have wood on hand.
How can I store tools effectively in a small workshop?
Maximize vertical space with wall-mounted pegboards, French cleats, and overhead racks to keep your floor clear. Mobile storage like rolling carts can be wheeled out when needed and tucked away when not in use, making every square foot work harder.
Should I store power tools plugged in or unplugged?
Always unplug power tools when not in use for safety. This prevents accidental starts and reduces fire risk from electrical issues. The few seconds it takes to plug in a tool is worth the peace of mind, especially if children or visitors access your workshop.
Can I mix different storage methods in one workshop?
Absolutely, and you should. Most efficient workshops combine several methods tailored to different tool types. Pair a pegboard for essential woodworking tools with drawer organizers for bits and blades, or use French cleats alongside rolling carts for the woodworker essential tools you reach for daily.
These questions address the concerns most beginners face when tackling workshop organization for the first time. Don’t feel pressure to implement all seven methods immediately. Start with one system that solves your biggest frustration, get comfortable with it, then expand your storage as your tool collection and skills grow.
Good tool storage isn’t just about tidying up, it transforms how you work. When every tool has its place, you spend less time searching and more time creating. Your tools last longer, your workspace feels less chaotic, and projects flow more smoothly.
Start simple. Pick one storage method that speaks to your immediate needs and workshop space. Install it, use it for a few weeks, then expand. You don’t need a perfect system overnight. Build it gradually as you discover what works best for your workflow.
Your workshop should inspire you, not frustrate you. With thoughtful storage choices, you’ll walk into a space that’s ready for whatever project calls to you next. Browse our other workshop organization guides to keep building a space you love working in.
