

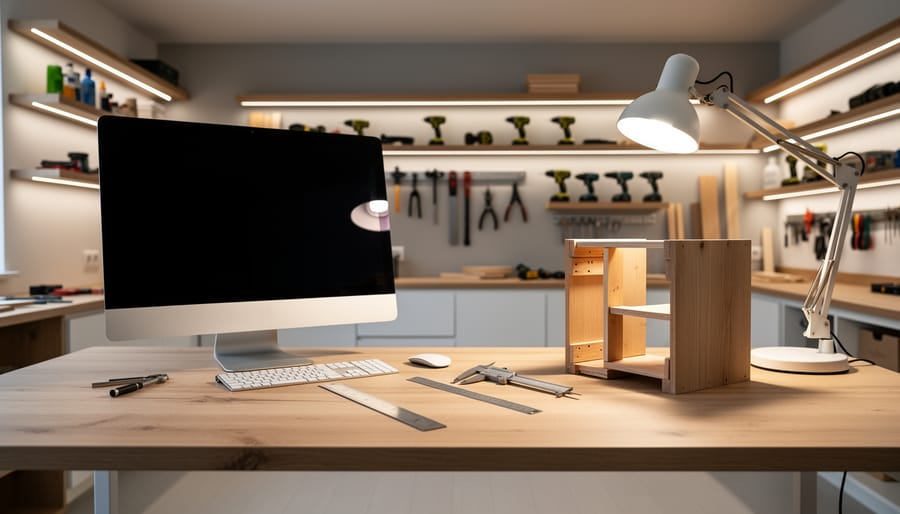
Getting the lighting right in your home office makes the difference between straining through work and actually enjoying your space, whether you’re answering emails or routing table edges. The best approach combines three lighting layers: overhead ambient light to fill the room evenly, task lighting aimed directly at your work surface, and accent lights to reduce screen glare and eye fatigue. This setup works for both computer-based tasks and hands-on woodworking projects, giving you the flexibility to switch between designing furniture plans on your monitor and actually building them at your workbench.
Poor lighting doesn’t just cause headaches. It sabotages accuracy when you’re measuring cuts, makes it harder to boost productivity during long work sessions, and can even create safety risks when you’re operating power tools. The challenge isn’t finding any light source, it’s choosing the right combination that serves double duty for screen work and sawdust-producing projects.
In this guide, you’ll find seven practical lighting setups that address both needs. Each option includes specific bulb recommendations, placement tips you can implement this weekend, and the most common installation mistakes that trip up first-time installers. By the end, you’ll know exactly what to buy, where to put it, and how to avoid the flickering, shadowy workspace that makes detailed work frustrating.
Why Workshop Lighting Matters for Your Home Office
When you’re working on a project to build a desk or craft custom storage, you need lighting that serves two completely different purposes. Detailed woodworking demands bright, shadow-free illumination so you can see pencil marks for accurate cuts, check grain direction before routing, and spot imperfections in your finish coat. Switch to planning your next project or ordering materials online, and that same intense light becomes uncomfortable, causing screen glare and eye fatigue during extended computer sessions.
This dual-purpose lighting challenge affects your safety too. Inadequate light around table saws, routers, and other woodworking tools increases the risk of accidents, you need to see exactly where your fingers are in relation to blades and bits. Poor lighting also leads to costly mistakes: misread measurements, uneven sanding you don’t notice until after staining, or joints that don’t fit because you couldn’t see the gap during dry-fitting.
The solution isn’t simply installing the brightest lights possible. You need flexible lighting that adapts to the task at hand, providing focused intensity for precision work and comfortable ambient levels for planning and administrative tasks. Getting this balance right makes your home office workshop safer, more productive, and far more enjoyable to work in for hours at a stretch.
How We Chose These Lighting Approaches
We evaluated each lighting approach based on four practical criteria that matter most when you’re setting up a dual-purpose workspace:
- Versatility for both detailed woodworking tasks and comfortable computer work
- DIY-friendly installation that doesn’t require professional electrician skills
- Budget considerations across different price points
- Effectiveness in various workspace sizes, from compact corners to full garage shops
These setups aren’t meant to be one-size-fits-all solutions. Your ideal lighting configuration depends on your specific workspace layout, the type of furniture projects you tackle, and how much time you spend at the computer versus the workbench. You might find that combining overhead shop lights with a good task lamp covers all your needs, or you may want to layer in multiple approaches for maximum flexibility. The beauty of these options is that you can start with one or two that address your biggest lighting challenges, then add others as your workshop evolves and your budget allows.
1. Overhead LED Shop Lights for Full Coverage
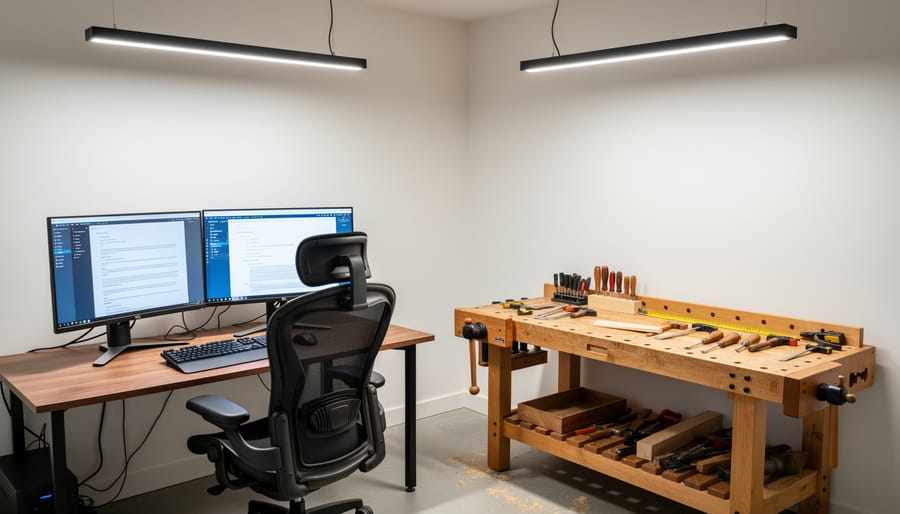
Ceiling-mounted LED shop lights form the backbone of any functional home office workshop because they flood your entire space with consistent, shadow-free illumination. When you’re measuring cuts or checking grain patterns on a furniture piece, you can’t afford dark corners or uneven lighting that forces you to second-guess your work.
For a dual-purpose workspace, aim for fixtures that deliver 4,000 to 10,000 lumens depending on your room size. A 10×12 space typically needs two 4-foot fixtures at 4,000 lumens each, while larger workshops benefit from three or four units to maintain even coverage. The sweet spot for color temperature sits between 5000K and 6500K, this daylight range renders wood tones accurately and keeps you alert during long build sessions without the harsh blue cast that strains your eyes during computer planning work.
Position your shop lights perpendicular to your main workbench rather than directly overhead. This angle prevents your body from casting shadows across your work surface when you lean in for detail tasks. Space fixtures 4 to 6 feet apart in parallel rows, and mount them 7 to 8 feet from the floor for optimal spread. Most LED shop lights come with chain or cable hangers for drop ceilings and direct-mount brackets for drywall ceilings, both install in under an hour with basic tools.
The real advantage shows up when you’re switching between activities. Adequate overhead lighting means you can reference plans at your desk, then walk straight to your bench for assembly without adjusting individual lamps. It also illuminates your tool storage areas so you’re not fumbling in shadows when you need to grab a specific chisel or clamp mid-project.
2. Task Lighting at Your Workbench and Desk
Task lighting puts concentrated light exactly where you need it, and for a home office workshop, you need it in two distinct places: your desk and your workbench. The good news is that the same adjustable fixtures work for both, but you’ll want to set them up differently.
For computer work at your desk, go with warmer light in the 2700K-3500K range. This softer, slightly yellowish light reduces eye strain during long planning sessions and doesn’t create harsh glare on your screen. Position your desk lamp to the side of your monitor (on the left if you’re right-handed, right if you’re left-handed) so it illuminates your keyboard and papers without bouncing off the screen. An adjustable arm lets you swing it out of the way when you don’t need it.
Your workbench demands different treatment. When you’re measuring dovetails, checking wood grain, or applying finish, you need bright, cool light in the 5000K-6500K range that reveals every detail. This is where clamp-on work lights shine. Mount one on each side of your main work area, angled down at about 45 degrees to eliminate shadows without creating glare. If you can only install one, position it opposite your dominant hand so you’re not working in your own shadow when reaching forward.
Look for fixtures with at least 800-1000 lumens output for workbench tasks. Adjustable gooseneck or articulating arm designs let you redirect light as you move around your project. Many affordable clamp lights now use LED bulbs, which stay cool to the touch and won’t scorch your wood if accidentally bumped against it during assembly.
3. Under-Cabinet LED Strips for Tool Walls
Under-cabinet LED strips transform dark tool storage walls into well-lit, functional spaces where you can instantly spot the chisel or drill bit you need. These thin, flexible light strips mount beneath shelves, pegboards, or wall-mounted cabinets to cast direct light downward onto your tools and work surfaces below.
You’ll find two main installation types. Adhesive-backed strips peel and stick directly to the underside of shelves, perfect for quick setups and rental spaces. They work great for lighter applications, though the adhesive can fail in dusty workshop environments over time. Mounted aluminum channels offer a more permanent solution. These hold the LED strips securely while providing a cleaner finished look and better heat dissipation, which extends the strip’s lifespan.
For power, plug-in options are easiest for beginners. You simply connect the strip to a small transformer that plugs into a standard outlet. Hardwired setups look cleaner without visible cords but require basic electrical work or an electrician’s help. Battery-powered strips exist but need frequent recharging, making them less practical for everyday workshop use.
The real benefit shows when you’re mid-project and reaching for tools. Instead of squinting into shadowy pegboard corners, everything’s clearly visible. These strips work seamlessly with French cleat systems, modular tool walls, and even simple plywood storage boards. Mount them about an inch back from the shelf edge to prevent glare while maximizing coverage below.
4. Natural Light Optimization with Window Placement
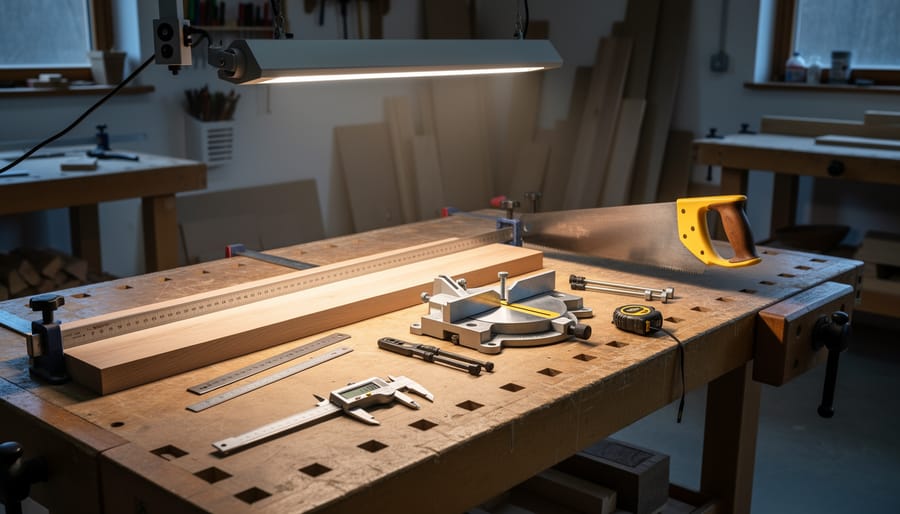
Windows are your best friend when they exist in your workspace, but positioning matters more than you might expect. The classic mistake is facing your workbench or desk directly toward a window, which creates intense glare on your computer screen and makes it hard to see detail work when the sun is bright. Instead, position your main work surface perpendicular to the window, place it so the light comes from your left or right side. This arrangement gives you excellent illumination without the glare, and you’ll notice a dramatic difference in how comfortably you can work through the afternoon.
Window light changes dramatically as the day progresses, and understanding this pattern helps you plan your tasks. Morning east-facing light is cooler and energizing, perfect for detailed measuring and layout work. Afternoon west-facing light tends to be warmer and more intense, which works well for sanding and assembly but can overwhelm computer tasks. If your workshop has north-facing windows, you’ll get consistent, diffused light all day, ideal for color-matching stains and finishes since it doesn’t shift in tone.
Natural light has limits, though. Overcast days leave you working in dim conditions, and any work session that extends past sunset requires artificial backup. Even on sunny days, deep workbenches and areas away from windows stay shadowy. Plan to supplement window light with overhead LEDs that can take over seamlessly when daylight fades, and add task lighting for those corners that never quite catch enough sun no matter how you arrange your space.
5. Portable Work Lights for Flexibility
Portable work lights solve the problem that happens almost daily in a home office workshop: you need bright, focused light somewhere your fixed lighting doesn’t reach. These movable lights go where you go, lighting up the inside of a cabinet you’re building, the underside of a desk during assembly, or the back corner of your workshop when you’re checking a stain application.
Battery-powered models give you complete freedom of movement without worrying about cord reach or outlet locations. Rechargeable LED work lights typically run 3-6 hours on a single charge, plenty for most projects. Corded versions offer unlimited runtime and often higher brightness, but you’ll need to plan your cord routing as you move around.
The mounting system makes all the difference in usefulness. Magnetic bases stick to steel workbenches, table saw surfaces, or metal tool cabinets, letting you position light hands-free while you work. Tripod stands adjust from floor level up to eye height and stay stable on uneven surfaces. Hanging hooks let you suspend lights from overhead, shelf brackets, or pegboard, directing light downward onto your work surface. Some models include all three mounting options in one light.
Look for adjustable brightness levels so you can dial in just enough light without washing out fine details. A color temperature around 5000K closely matches daylight and helps you see wood grain and finish quality accurately. Sturdy construction matters too, workshop lights take bumps and occasional drops without complaint.
6. Layered Lighting with Dimmers
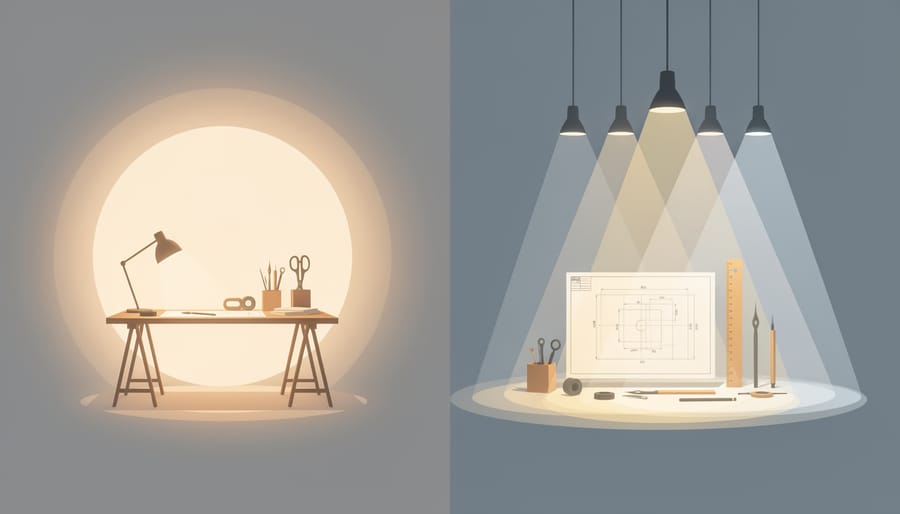
Layered lighting transforms a one-size-fits-all workspace into a flexible environment that adapts to whatever you’re doing. The concept is simple: instead of relying on a single bright overhead light, you combine three types of lighting, ambient (overall room illumination), task (focused work light), and accent (highlighting specific areas), and control their intensity with dimmers.
Here’s why this matters for your home office workshop. Detailed sanding requires bright, even light so you can spot imperfections in the wood grain. Computer planning sessions need softer, warmer light to reduce screen glare and eye strain. General cleanup works fine with moderate ambient lighting. With layered lighting and dimmers, you dial each zone up or down without switching fixtures on and off.
Start with your existing overhead shop lights on one dimmer circuit. Add task lighting at your workbench and desk on separate switches or dimmers. If you have under-cabinet LED strips illuminating your tool wall, put those on their own control. This gives you independent adjustment of each layer. During precision work, crank up the task light and keep ambient light moderate. When you’re sketching project ideas at your desk, dim the overhead completely and use just your desk lamp. For video calls, balance both to avoid harsh shadows.
Adding dimmers is straightforward. For standard incandescent or LED-compatible fixtures, replace your existing wall switch with a dimmer switch. Make sure the dimmer is rated for LED if you’re using LED bulbs, as older dimmers designed for incandescent bulbs can cause flickering. Most dimmer switches install in fifteen minutes with basic tools and no rewiring. Turn off the circuit breaker first, remove the old switch, connect the wires to the dimmer following the included diagram, and secure it to the wall box.
For plug-in lamps, use inline dimmer cords or smart plugs with dimming capability, which require zero electrical work.
7. Focused Magnifier Lights for Detail Work
When you’re fitting dovetails or installing tiny brass hinges on a jewelry box, standard overhead lights just don’t cut it. A magnifier lamp with built-in LED illumination gets your eyes close to the work while eliminating shadows that hide layout lines and tool placement.
These specialized lamps typically combine 2x to 5x magnification with a bright LED ring surrounding the lens. The circular light pattern eliminates the harsh shadows you’d get from a single-direction task light, letting you see exactly where your chisel is cutting or how that veneer edge lines up. They’re game-changers for anyone doing intricate joinery, hand-cut dovetails, delicate carving, or applying finish to small details.
You’ll especially appreciate a magnifier light if you’re over 40 and noticing that close-up work requires more light than it used to. They’re also invaluable when working with dark woods like walnut where layout lines disappear under normal lighting.
Most magnifier lamps come with three mounting options: clamp-on bases for attaching to your workbench edge, weighted stands you can move around, or articulating arms that mount to your bench or wall. The clamp-on style works well if you already have your essential shop tools organized and don’t want to sacrifice bench space.
Think of your magnifier light as the finishing layer in your lighting setup. Your overhead LEDs provide general visibility, task lights illuminate the immediate work area, and the magnifier handles those moments when precision really matters.
Quick Installation Tips for DIY Lighting Upgrades
Before you drill that first hole or wire your first fixture, a bit of prep work saves headaches down the road. Start by checking your circuit breaker panel, most home office spaces run on 15-amp circuits, which handle LED lighting easily, but if you’re adding multiple fixtures to an already busy circuit, you might trip breakers. Count what’s already plugged in on that circuit before loading it up.
For mounting overhead lights, know your ceiling type. Drywall ceilings need anchors rated for the fixture’s weight, toggle bolts work great for heavier shop lights. If you’re lucky enough to mount directly into joists or exposed beams (common in garage-converted workshops), use wood screws instead. A stud finder becomes your best friend here.
Cable management matters more than you’d think. Zip ties and adhesive cable channels keep power cords off your work surfaces and out from underfoot. For LED strips, run wiring along cabinet edges or behind trim where it won’t snag on lumber you’re moving around.
Most plug-in solutions you can tackle yourself: clamp lights, battery-powered portables, and adhesive LED strips require zero electrical knowledge. But hardwiring overhead fixtures into your electrical system? That’s electrician territory unless you’re comfortable working with live wires and local electrical codes. There’s no shame in calling a pro for the permanent installations, they’ll ensure everything’s grounded properly and up to code, which matters for both safety and insurance purposes.
Common Lighting Mistakes to Avoid
Most lighting problems in a home office workshop stem from decisions you can easily fix once you know what to look for.
The biggest mistake is relying on a single overhead fixture and calling it done. One ceiling light creates harsh shadows exactly where you don’t want them, across your workbench when you’re leaning over a project, or on your desk when you’re trying to read plans. Layer your lighting instead: combine overhead coverage with task lights at specific work areas.
Choosing the wrong color temperature trips up many beginners. That warm, cozy 2700K bulb might feel nice in a living room, but it makes it nearly impossible to see pencil marks on wood or judge finish color accurately. Stick with 5000K-6500K (daylight range) for your main workshop lights, and save warmer temperatures for a desk lamp if you want softer lighting during computer-heavy sessions.
Glare on your computer screen happens when bright lights sit directly behind your monitor or reflect off the screen surface. Position your desk so overhead lights don’t shine directly into your eyes, and use a task lamp angled from the side rather than from behind your monitor.
Power outlet placement seems obvious until you’re halfway through a project and realize your extension cords have become trip hazards snaking across the floor. Before installing new lights, map out where you actually work and plan outlets or hardwired fixtures accordingly. Adding a power strip to your workbench area solves a lot of portable tool and task light headaches.
What color temperature should I use for workshop tasks?
Use 5000K-6500K for detailed woodworking and tool work. This daylight range shows true wood color and makes measurements easier to read.
How many lumens do I need for a home workshop?
Aim for 50-75 lumens per square foot for general workshop lighting. For a 10×12 foot space, that means 6,000-9,000 total lumens from all your fixtures combined.
What’s the most budget-friendly way to start improving my lighting?
Add a good clamp-on task light at your workbench first. You’ll get immediate improvement where it matters most for under $30, then build out from there.
Can I mix different color temperatures in the same space?
Yes, but be intentional about it. Use cooler daylight bulbs for your main workshop lights and task lighting, then add a warmer desk lamp for computer work if you prefer softer light during planning sessions.
The fix for inadequate workbench lighting is straightforward: if you find yourself constantly leaning in or repositioning projects to see clearly, you need more light right there. A dedicated task light makes those frustrating moments disappear and helps you spot mistakes before they become permanent.
Good lighting for your home office workshop isn’t something you solve with one trip to the hardware store. It’s about building layers that work together, overhead coverage for safety, task lights where precision counts, and flexible options you can move as projects evolve. You don’t need all seven setups at once. Start with solid overhead shop lights, add a quality desk lamp, then expand based on what you actually build and where you struggle to see clearly.
As you improve your lighting, you’ll notice the difference immediately. Measurements become easier to read. Finish flaws show up before the project’s complete. Your eyes feel less tired after long sessions. Better visibility means better furniture, fewer mistakes, and more confidence tackling detailed work. That’s worth the effort.
