

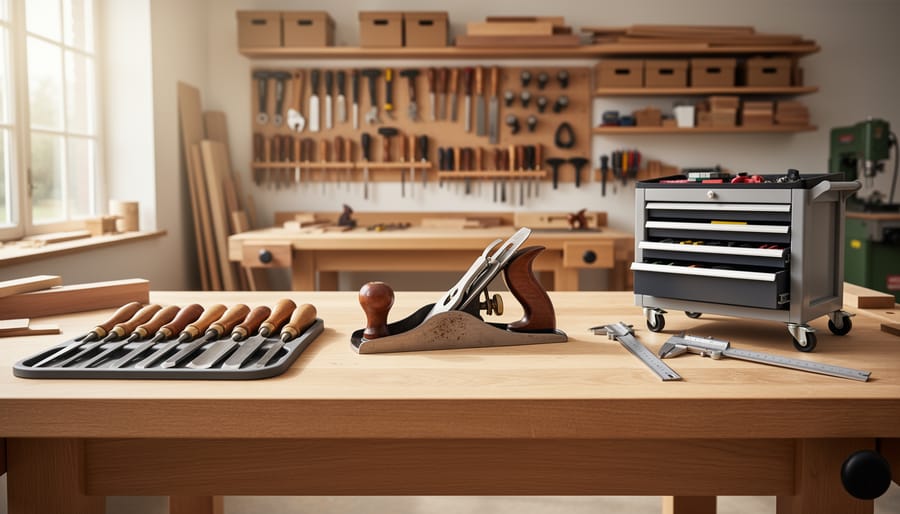
A cluttered workshop full of scattered tools isn’t just frustrating. It costs you time, money, and momentum on every project. The 5S methodology, a lean manufacturing principle adapted for workshop tool organization, transforms chaotic storage into an efficient system where every tool has a designated home and can be found in seconds. This approach centers on five Japanese concepts: Seiri (Sort), Seiton (Set in Order), Seiso (Shine), Seiketsu (Standardize), and Shitsuke (Sustain).
For furniture makers and woodworking hobbyists, 5S isn’t about buying expensive commercial storage systems. It’s a mindset shift that works with simple DIY solutions you can build yourself. The framework guides you through removing tools you don’t actually use, arranging what remains for optimal workflow, keeping everything clean and ready, creating visual standards anyone can follow, and building habits that maintain the system long-term.
The seven methods we’ll explore show you exactly how to apply each 5S principle to different tool categories in your shop. You’ll see how French cleat walls embody “Set in Order,” why shadow boards represent “Standardize” perfectly, and how mobile tool carts support “Sustain.” Each solution addresses real workshop challenges with practical builds that match your skill level, whether you’re organizing your first garage shop or refining a dedicated workspace you’ve used for years.
Why 5S Organization Matters in Your Workshop
A cluttered workshop isn’t just annoying, it genuinely costs you. When you can’t find the right chisel or spend five minutes digging through a drawer for that specific drill bit, you’re losing precious build time. Multiply those small delays across a project, and you’ve wasted hours that could’ve gone toward actual woodworking.
Beyond time, there’s the safety factor. A disorganized bench means tools get left where they shouldn’t be, increasing your risk of cuts, trips, or accidentally grabbing the wrong tool mid-cut. When every tool has a clear home and your essential woodworking tools are always within reach, you work with more confidence and fewer interruptions.
The real payoff? You’ll finish projects faster and enjoy the process more. A well-organized system, built on solid workshop storage ideas means you spend your energy on craftsmanship instead of hunting for misplaced equipment. That shift transforms how productive and satisfying your woodworking becomes.
How We Selected These Storage Methods
We chose these seven storage methods because they work with the woodworker essential tools most of us actually use, not theoretical perfection. Each method directly supports at least one 5S principle while remaining buildable for beginners. We prioritized solutions that adapt to different workshop sizes, whether you’re working in a garage corner or a dedicated shop, and varying budgets, from simple magnetic strips to more involved French cleat systems. Most importantly, we selected methods that grow with you. Start with pegboard if you’re just getting organized, then add shadow foam drawers as your tool collection expands. Every option here balances immediate functionality with long-term sustainability.
1. Pegboard Systems: Visual Organization at Its Best
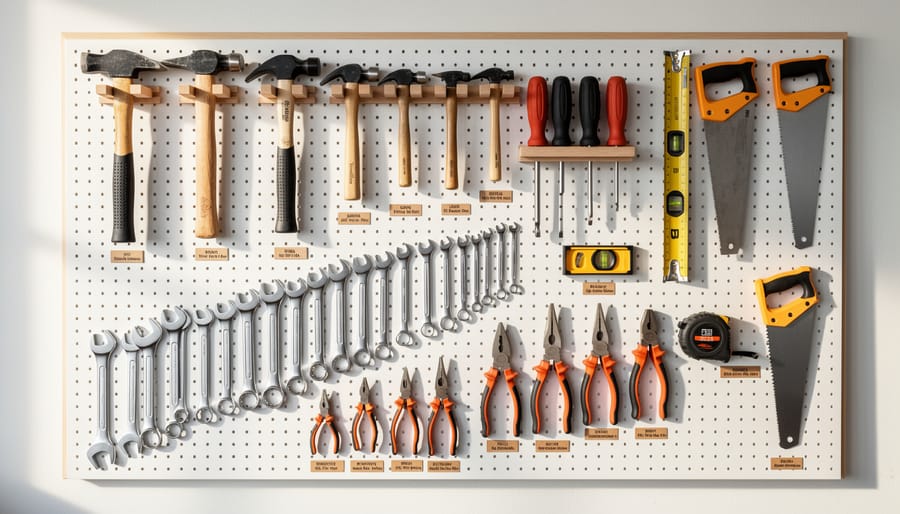
Pegboard systems deliver one of the clearest applications of the 5S ‘Set in Order’ principle. Every tool gets a designated spot, and you see at a glance what’s missing. The visual nature of pegboard makes it nearly impossible to lose track of tools or forget where something belongs.
Start by choosing your pegboard location. Mount it where you’ll use tools most often, ideally near your primary work surface. Consider your workshop lighting when selecting the wall, since shadows can make it harder to see smaller tools. Secure the pegboard with furring strips behind it to create the gap hooks need to fit through the holes.
The real power comes from planning your layout before hanging a single tool. Group tools by type or by project phase. Place your most-used tools at eye level and within easy reach. Less frequent tools can go higher or to the sides.
Once you’ve arranged your tools, trace their outlines directly on the pegboard with a marker or paint pen. These shadows create a visual system that makes returning tools effortless. You’ll know immediately when something’s out of place.
- Space hooks to allow easy tool removal without bumping adjacent items
- Create clear tool shadows using permanent marker, paint pen, or vinyl cut-outs
- Organize by frequency of use, placing daily tools at chest height and occasional tools higher
Maintaining a pegboard system requires minimal effort. When you finish a task, the outlined spots guide tools back to their homes. If you add new tools, create their outlines right away. This small discipline keeps the system working smoothly and prevents the gradual chaos that undermines organization over time.
2. French Cleat Tool Wall: Modular and Adaptable
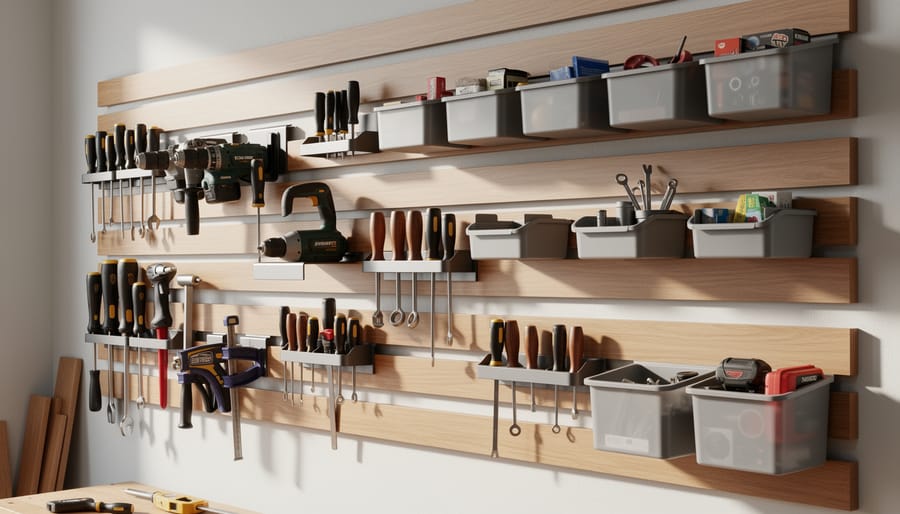
French cleats give you the flexibility to reconfigure your tool storage as your projects and needs evolve. This modular system uses angled wooden strips, one mounted to the wall, another attached to tool holders, that interlock securely while allowing you to slide holders left or right and swap them out entirely. That adaptability is why cleats excel at the ‘Standardize’ principle: you establish one consistent mounting method across your entire wall, then build custom holders for any tool without drilling new holes or changing your approach.
Building the wall-mounted cleat strips is straightforward. Rip a length of 3/4-inch plywood or solid lumber at a 45-degree angle, creating two long pieces with matching bevels. Screw the wall-side piece horizontally across your studs with the bevel angled down and out, creating a lip. The holder-side pieces get the opposite bevel, angled up and back, so they hook over the wall strip and lock in place under their own weight. Make multiple wall strips at the same height, or stagger them vertically to accommodate different holder sizes.
Creating custom holders is where the system shines. Attach a cleat strip to the back of a simple plywood box for chisels, add one to a drill bit organizer, or mount it behind a horizontal bar for hanging hand saws. Each holder stays perfectly vertical against the wall and lifts off in seconds when you need to bring tools to a remote job. As your collection grows, you build new holders using the same cleat angle, maintaining that standardized approach while customizing storage for whatever you add next.
3. Mobile Tool Carts: Bring Tools to the Work
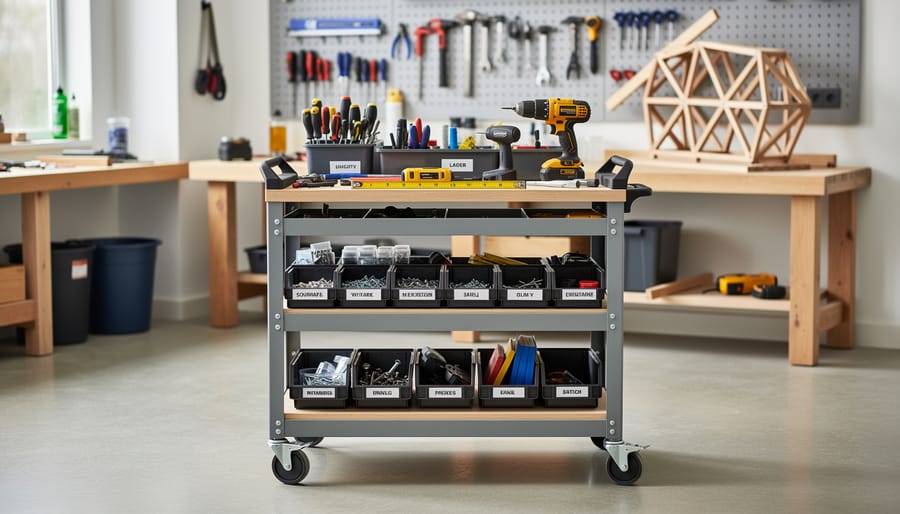
Mobile tool carts transform how you organize around projects rather than just storing tools. They’re a direct application of the 5S ‘Sort’ principle because you’re grouping exactly what you need for specific tasks, eliminating the constant back-and-forth to fixed storage locations.
The key to an effective cart is thinking in terms of workflows. For furniture-making, you might dedicate one cart to joinery work (chisels, marking gauges, squares, layout tools) and another to finishing (sanders, brushes, finish containers). This sorting by task means you’re only handling relevant tools, not wading through everything you own.
When designing your cart layout, place the heaviest items on lower shelves for stability. Reserve the top surface for tools you’ll grab repeatedly during a project. Adding a small drawer or bin on one level keeps screws, pencils, and measuring tape from wandering off. If you’re building your own cart, make it narrow enough to roll through doorways but wide enough that tools won’t tip when you move it.
The real challenge with mobile carts is maintaining organization between projects. Before you roll the cart back to storage, take five minutes to return each tool to its designated spot. Wipe down dusty surfaces (supporting the ‘Shine’ principle) and remove any trash or cutoffs that accumulated. This ritual prevents carts from becoming rolling junk drawers.
Consider adding a simple label or tag to each cart identifying its purpose: “Assembly Cart” or “Finishing Station.” This standardization helps you grab the right cart immediately when starting a new project, and it reinforces the discipline of keeping each cart focused on its specific function.
4. Shadow Foam Tool Drawers: Everything in Its Place
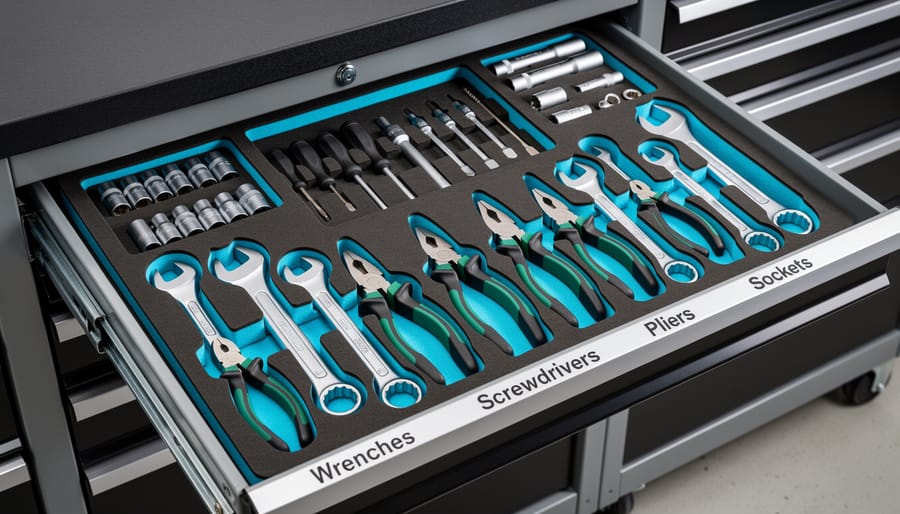
Shadow foam tool drawers take the 5S principle of ‘Set in Order’ to its logical extreme. By creating exact cutouts for each tool, you build a system where everything has one specific place and nothing else fits there. The colored foam underneath creates a visual shadow that instantly shows when a tool is missing, making it impossible to close up shop with tools left on the bench or lost in a project pile.
Start by emptying your drawers and sorting tools by frequency of use and type. The most-used tools should go in the top drawers at waist height. Group related items together: all your measuring tools in one section, chisels in another, specialty hand tools in their own zone. Take photos of your layout before committing to foam.
Most shadow foam comes in two layers: a top layer (usually black) and a contrasting bottom layer in bright yellow, red, or blue. Trace each tool onto the top layer, then carefully cut out the shape with a sharp utility knife or hot knife tool designed for foam. The hot knife melts through cleanly and creates smoother edges than cutting, but either method works if you take your time.
Leave about a quarter-inch of space around each tool for easy removal. Tools packed too tightly become frustrating to grab, defeating the whole purpose. For irregular shapes like adjustable wrenches or combination squares, orient them so you can lift them out naturally with one hand.
The real power of shadow foam shows up at cleanup time. Those bright colored outlines nag at you until every tool returns home, turning ‘Set in Order’ from a good intention into an automatic habit you can’t ignore.
5. Magnetic Tool Strips: Quick-Access Storage
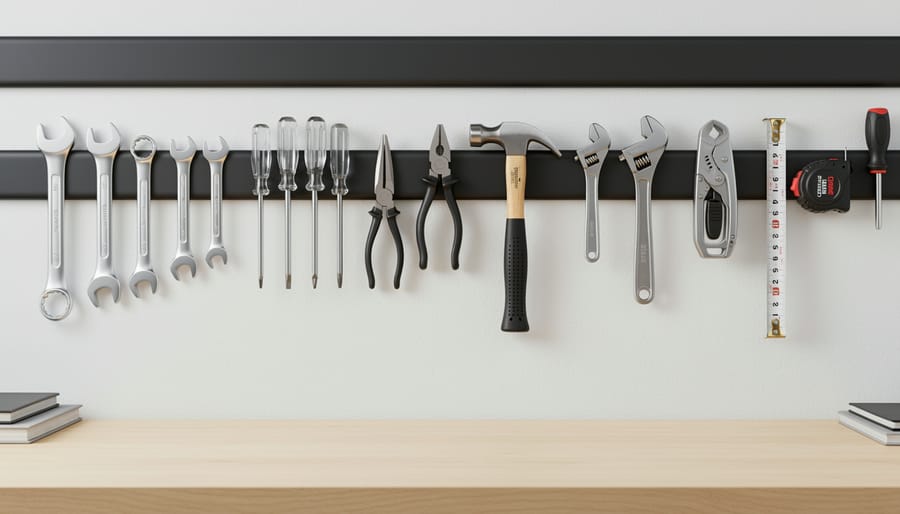
Magnetic tool strips offer one of the simplest ways to implement the ‘Shine’ principle of 5S, keeping your workspace clean, visible, and ready for action. When your chisels, screwdrivers, and marking tools hover on a magnetic strip just above your workbench, you can see instantly what you need and grab it in one motion. No digging through drawers or fumbling with hooks.
The visibility factor makes magnetic strips especially powerful. You’ll notice immediately if a tool hasn’t been returned or if something needs cleaning. That instant visual feedback reinforces good habits and keeps your most-used tools in top condition. Plus, the tools hang in the air, preventing the dust buildup that happens in drawers and letting you spot rust or damage quickly.
Placement makes or breaks a magnetic strip system. Mount strips 6 to 12 inches above your primary work surface, within easy reach without leaning. Position them near where you actually use the tools, marking tools by your layout area, chisels near your bench vise. Avoid placing strips where sawdust from power tools will constantly coat your hanging tools.
Weight limits matter more than you might think. Standard magnetic strips hold small hand tools fine, screwdrivers, pliers, chisels, but struggle with heavier items like hammers or large wrenches. Check the manufacturer’s specifications, and test a loaded strip for 24 hours before trusting it with expensive tools. For heavier tools, look for industrial-strength strips or stick with other storage methods.
Keep strips clean by wiping them weekly when you’re doing your regular shop cleanup. Metal dust and particles weaken the magnetic hold over time, and sticky residue from finishes creates the same problem.
6. Labeled Bin Systems: Organizing Small Parts and Accessories
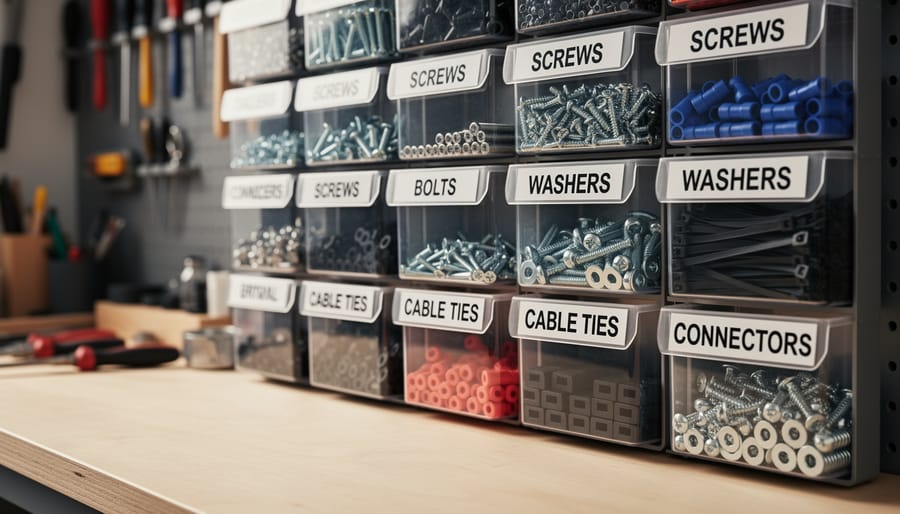
Small parts and fasteners are where workshop chaos begins. A jumbled drawer of screws, bits, and hardware costs you minutes every time you hunt for the right piece. Clear, labeled bin systems solve this problem by embodying both the ‘Sort’ and ‘Standardize’ principles of 5S methodology. When you can see what you have and know exactly where it belongs, you maintain organization without thinking about it.
Start by sorting your small parts into logical categories. Empty everything out and group similar items together. You’ll quickly identify what you actually use versus what’s been gathering dust for years. This initial sort is crucial, it reveals patterns in how you work and what you need within arm’s reach.
Effective categorization strategies for screws, nails, drill bits, router bits, and other small items:
- Group screws by type first (wood, drywall, deck), then by length within each type
- Separate drill bits by material (wood, metal, masonry) rather than mixing all sizes together
- Keep router bits organized by profile shape, storing matched sets in their own containers
- Sort nails and fasteners by project type (finish work, framing, specialty) for quick retrieval
- Create a separate “current project” bin that temporarily holds exactly what you need for work in progress
Choose clear bins so you can verify contents at a glance. This transparency reinforces productivity through design you’re not opening five containers to find what you need. Label every bin with both text and, if helpful, a photo or sample piece taped to the front. A label maker works well, but even masking tape and a permanent marker maintains the standard.
The key to sustaining this system is the two-minute rule: when you finish using something, return it immediately. It takes seconds to drop a drill bit back in its bin, but finding it scattered on your bench tomorrow wastes far more time.
7. Wall-Mounted Tool Racks: Maximizing Vertical Space
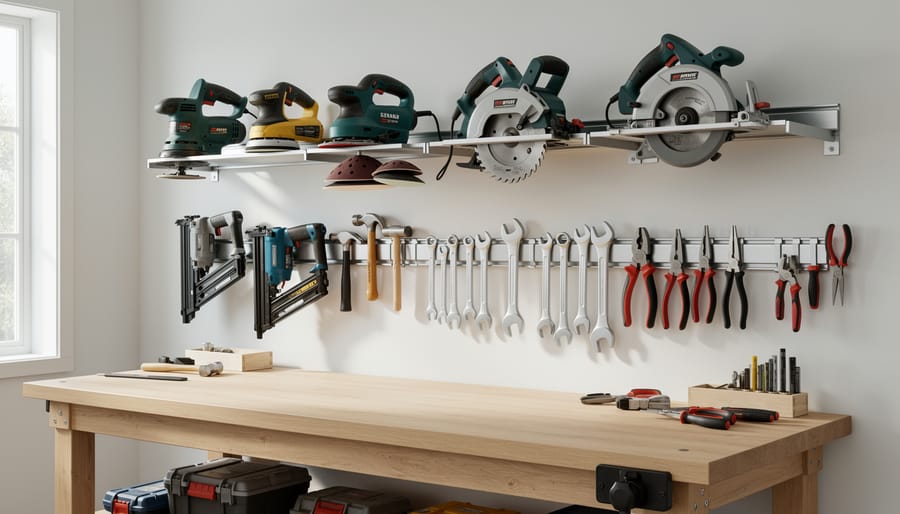
Wall-mounted tool racks represent the ‘Sustain’ principle in action because they create such obvious, dedicated homes for tools that maintaining your organization becomes almost effortless. When returning a handsaw to a specifically-sized slot takes less effort than leaning it in a corner, you’ll actually use your storage system consistently.
The beauty of dedicated racks is their simplicity. A clamp rack is just a series of pipes or dowels mounted perpendicular to the wall, spaced to match your clamp jaw depths. Your clamps slide on horizontally, stay visible, and grab in seconds. You can build one with 3/4-inch dowels and a scrap of plywood in under an hour. Drill holes at a slight upward angle so gravity keeps the clamps from sliding off unintentionally.
For hand planes, create a simple shelf with a fence along the front edge, positioned so planes rest on their sides rather than their soles. This protects the blade and keeps them stable. Space the fence about an inch from the wall to allow air circulation and prevent rust. A 1×4 shelf with a 1×2 fence mounted 3/4 inch from the edge works perfectly.
Handsaws benefit from horizontal storage that supports their full length. Mount cleats or simple wooden blocks with kerfs cut to match your saw plate thickness. The saw blade rests in the kerf while the handle extends beyond, making it easy to grab without reaching over sharp teeth.
The key to sustaining any rack system is keeping it dead simple. If mounting a tool requires threading it through complex holders or performing a three-step process, you’ll eventually stop using the rack. One motion to store, one motion to retrieve, and the system maintains itself.
Common Questions About 5S Workshop Organization
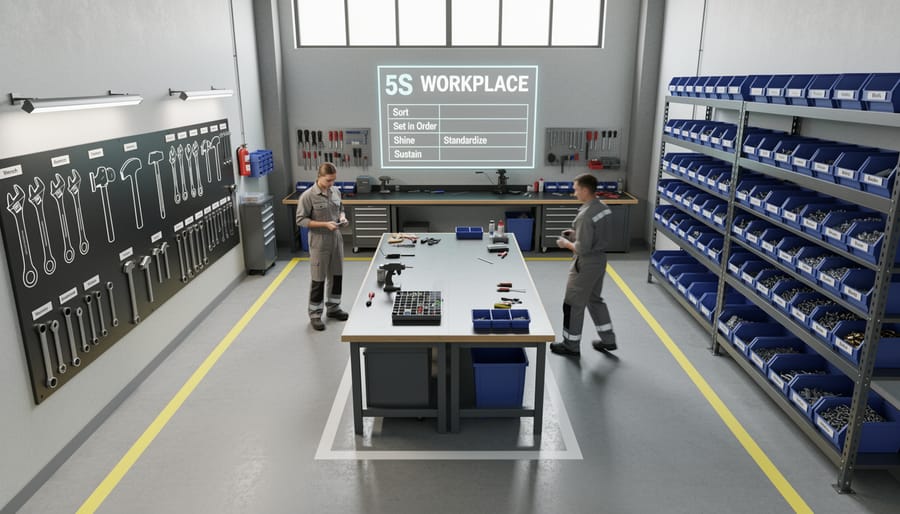
Starting a 5S system in your home workshop raises practical questions, especially when you’re balancing budget, space, and the reality of ongoing projects. Here’s what woodworkers most often ask when implementing these organizational methods.
Can I start 5S organization on a tight budget?
Absolutely. Begin with one low-cost method like magnetic strips or simple pegboard sections, master that system, then expand as budget allows. The ‘Sort’ step costs nothing, removing unused tools and consolidating duplicates often frees up enough space that you need less storage than you thought.
How do I keep my 5S system from falling apart after a few months?
The ‘Sustain’ principle succeeds when returning tools takes less effort than leaving them out. Make your storage locations convenient to where you actually work, not where they look neat, and schedule a 10-minute reset at the end of each shop session before the mess accumulates.
Which storage method works best for a small workshop?
Vertical solutions like French cleats and pegboard maximize limited floor space while keeping tools accessible. Mobile carts let you roll stored tools out of the way when you need room to work, then bring them back when needed.
Can I combine multiple storage methods without creating chaos?
Yes, successful workshops typically use three to four methods together. The key is assigning each tool category to one specific system, hand tools on pegboard, power tools on French cleats, hardware in labeled bins, so you always know exactly where to look.
The biggest mistake is trying to implement all seven methods at once. Your brain needs time to build the habit of returning tools to their homes. Pick the storage method that addresses your most frustrating problem, maybe it’s tripping over clamps or spending ten minutes hunting for the right drill bit, and solve that first. Once that system becomes automatic, add another method. This incremental approach feels less overwhelming and actually sticks, which is what the ‘Sustain’ principle is all about.
The seven storage methods we’ve explored all support 5S principles, but here’s what matters most: pick the approach that fits your actual workflow. Start with the one method that addresses your biggest frustration right now. That pegboard driving you crazy? Tackle it first. Can’t find drill bits? Sort out those labeled bins.
Master that single system before adding another. The ‘Sustain’ principle isn’t about overnight transformation. It’s about building habits that stick. When you return that chisel to its shadow foam cutout without thinking, you’ve succeeded.
Your workshop doesn’t need to look like a showroom. It needs to work for the projects you build and the way you work. Some tools will live on French cleats, others in drawers, maybe a few on magnetic strips near your bench. That’s not a failure of consistency; that’s smart adaptation.
The real win comes three months from now when you spend your Saturday actually building instead of hunting for tools. You’ll know exactly where everything lives because you created homes that make sense to you. That’s 5S working.
