

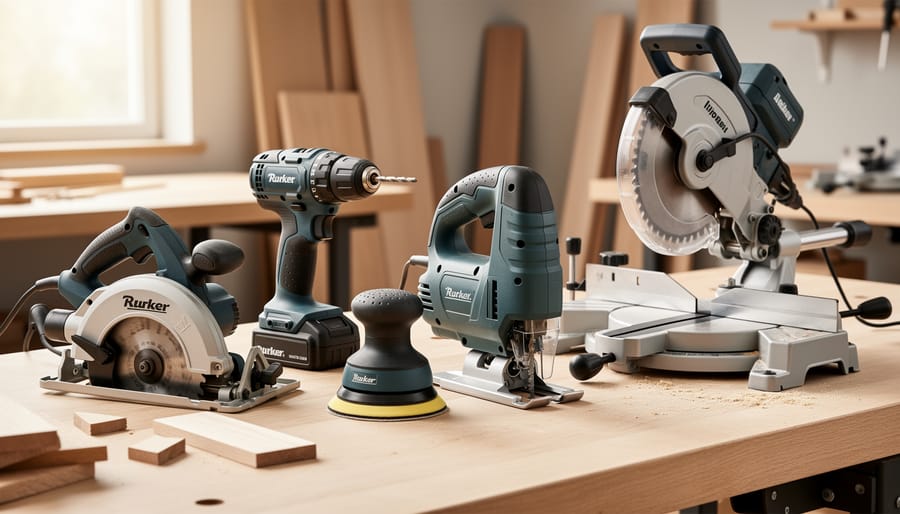
Starting woodworking in 2026 requires just five essential power tools, costing roughly $500 to $800 total, and you can begin building furniture within your first weekend. You don’t need a garage full of equipment or years of experience. What you need is a strategic approach to buying tools that will handle 90% of beginner projects without overwhelming your budget or your workshop space.
The confusion most beginners face isn’t about whether to start woodworking. It’s about standing in a hardware store or scrolling through endless online options, paralyzed by questions: Do I really need that $600 table saw? Will a cheaper drill actually work? What’s the difference between a circular saw and a miter saw, and why does everyone seem to own both?
Here’s what actually matters. The right five tools will let you cut wood accurately, join pieces together securely, smooth surfaces professionally, and shape edges cleanly. That covers the fundamental operations for building bookcases, coffee tables, desks, and dozens of other projects. Everything else can wait.
This guide walks you through each essential tool with complete transparency about what features you truly need versus marketing hype, realistic price ranges for quality equipment that won’t fail after three projects, and the safety basics that keep your fingers attached to your hands. We’ll cover exactly what each tool does, why it made the essential list, and how to verify you’re ready to start building real furniture instead of collecting dust-covered equipment.
What You’ll Need to Get Started
You’ll need just five power tools to tackle most beginner woodworking projects, including building your own office furniture from scratch. These aren’t random picks. They’re the essential tools that professional woodworkers reach for daily and that beginners can master without years of practice.
Each tool in this guide handles a specific job that comes up in nearly every project. You’ll use them to break down lumber, make precise cuts, join pieces together, smooth rough surfaces, and add finishing touches. Together, they create a complete workflow from raw material to finished furniture.
Here’s what makes this approach realistic. You can acquire all five tools for around $400 to $700 total if you shop smart and stick with reputable mid-range brands. That’s far less than buying a full workshop worth of equipment you might never use. You also won’t need a massive space. A single-car garage or even a dedicated corner of a basement provides enough room to set up and use these tools safely.
These five form a foundation you can build on. Once you’ve completed a few projects and identified what you enjoy making most, you’ll know exactly which specialized tools to add next. Starting here means you’re investing in capability, not collecting tools that sit unused.
Safety First: What to Know Before You Power Up
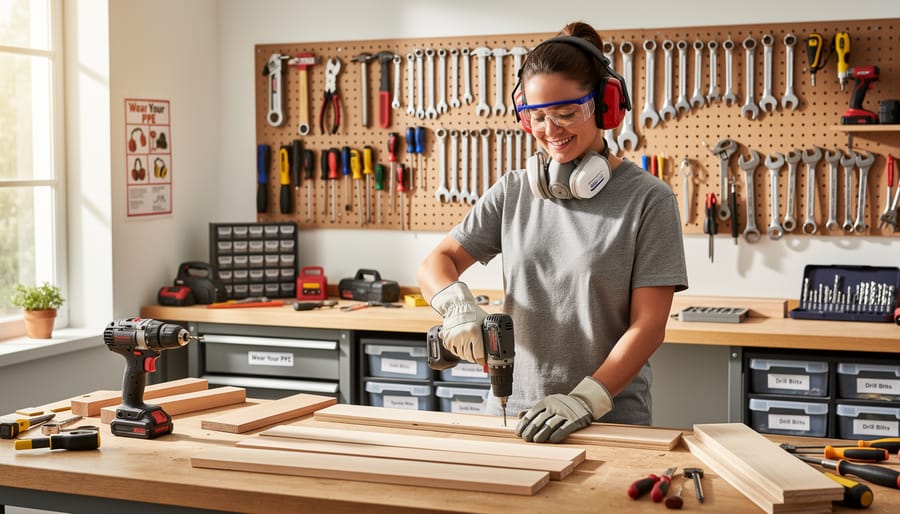
Before you plug in a single power tool, let’s talk about keeping all your fingers attached. Safety gear isn’t optional, it’s the difference between a productive workshop session and a trip to the emergency room.
Eye Protection Is Non-Negotiable
Safety glasses or goggles need to go on before you turn on any power tool. Wood chips, sawdust, and debris fly toward your face at surprising speeds, and standard prescription glasses won’t cut it. Get ANSI Z87.1-rated safety glasses that wrap around the sides of your face. They cost about ten bucks and prevent the most common woodworking injuries.
Protect Your Hearing
Power tools are loud, circular saws hit 100 decibels, roughly as loud as a chainsaw. Prolonged exposure causes permanent hearing damage you won’t notice until it’s too late. Foam earplugs work fine for quick cuts, but over-ear hearing protection is more comfortable for longer sessions and actually stays in place.
Dust Masks and Respiratory Protection
Wood dust isn’t just annoying; it’s a respiratory hazard. Fine particles from sanding get deep into your lungs and cause long-term problems. Start with N95 masks for general use. When you’re sanding MDF or exotic hardwoods, upgrade to a respirator with P100 filters.
What to Wear (and What to Avoid)
Tie back long hair, skip the loose sleeves, and ditch jewelry. Gloves seem smart but actually increase danger around spinning blades, they can catch and pull your hand into the tool. Wear close-fitting clothes, closed-toe shoes (steel-toed boots are even better), and leave rings and bracelets in a drawer.
Common Rookie Mistakes
Beginners often remove blade guards because they block the view. Don’t. They’re there for a reason. Another mistake: reaching over or behind a running blade to grab a cutoff piece. Wait for the blade to stop completely. Finally, never hold small pieces with your hands while cutting, that’s what clamps and push sticks are for.
The Five Essential Power Tools for Beginners
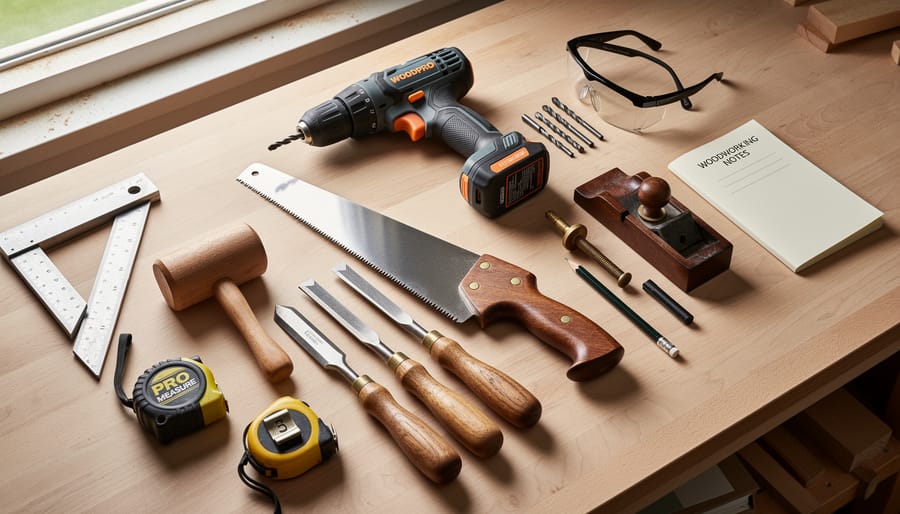
Circular Saw: Your Go-To Cutting Workhorse
A circular saw slices through lumber and sheet goods like plywood in straight lines, making it your primary tool for breaking down materials to size. You’ll reach for this saw constantly, cutting 2x4s to length for desk frames, trimming plywood panels for tabletops, or ripping boards down to narrower widths.
For beginners, a 7¼-inch blade circular saw hits the sweet spot. It handles everything from ½-inch plywood to 2-inch dimensional lumber while staying lightweight enough to control comfortably. Look for a model with at least 15 amps of power, anything less bogs down in hardwoods and thick stock.
Bevel capacity matters when you need angled cuts. Most saws tilt to 45 degrees, which covers picture frames and angled joints. Check that the bevel adjustment locks firmly; a loose setting ruins your cut accuracy.
Start with a corded model. Yes, cordless versions exist, but they’re pricier and drain batteries fast on sustained cuts. You’ll appreciate the consistent power when ripping an entire sheet of plywood.
The base plate (that flat metal piece) should be cast or stamped metal, not flimsy plastic. A sturdy base keeps cuts straight and withstands years of workshop use. Expect to spend $60-120 for a solid beginner saw that’ll handle hundreds of projects.
Cordless Drill/Driver: The Most Versatile Tool You’ll Own
A cordless drill/driver does two jobs that come up in literally every woodworking project: drilling holes and driving screws. You’ll use it to create pilot holes before screws go in (preventing wood from splitting), to drive those screws, and to drill holes for dowels, shelf pins, and hardware. Unlike a corded drill, you’re not tethered to an outlet, you can move freely around your workspace and position yourself at any angle.
For beginners, look for an 18-volt or 20-volt model. That voltage range gives you enough power for hardwoods and repetitive tasks without the weight and cost of professional-grade tools. Anything below 12 volts struggles with dense materials, while 24-volt models add bulk you don’t need yet.
The chuck (the part that holds drill bits and driver bits) should be 3/8-inch or 1/2-inch. A 1/2-inch chuck accepts larger bits, but 3/8-inch handles most furniture-building tasks just fine. Get a keyless chuck so you can change bits quickly without fumbling for a small metal key.
Battery capacity matters more than you’d think. Look for at least 2.0Ah batteries, and buy a kit with two batteries so one charges while you work. Running out of battery mid-project when you’re on a rhythm is frustrating, and having a backup keeps you moving.
Random Orbital Sander: From Rough to Smooth
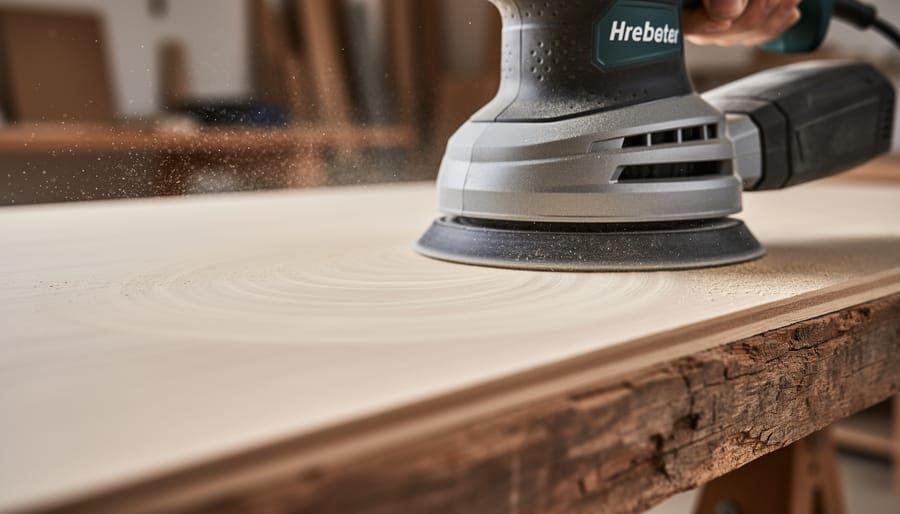
A random orbital sander transforms rough lumber into glass-smooth surfaces ready for stain or finish. It works by spinning and vibrating simultaneously, which prevents those circular scratch marks you’d get from a regular disc sander. This random movement pattern is exactly why beginners should start with an orbital sander instead of a belt sander or sheet sander, it’s nearly impossible to gouge your wood or create uneven spots.
For office furniture projects, you’ll sand almost every surface before applying finish. The sander removes saw marks, evens out glued joints, and creates the silky texture that makes homemade furniture look professional.
Look for a 5-inch pad size, which balances control with coverage area. Variable speed matters more than you’d think, start slow on edges and corners where you might accidentally round over sharp lines, then crank it up for flat surfaces. Some beginners skip this feature to save money and regret it later.
Dust collection isn’t optional. Sanders create enormous amounts of fine dust that coats everything in your workshop and your lungs. Buy a model with good dust ports that connect to a shop vacuum. The cleanup time you save and the air quality improvement are worth every penny of the initial investment.
Jigsaw: For Curves and Detail Work
A jigsaw lets you cut curves, circles, and irregular shapes that your circular saw can’t handle. Think rounded desk edges, cable management holes in shelves, or decorative cutouts in drawer fronts. This tool shines when you need anything beyond a straight line.
You’ll see jigsaws labeled as orbital or non-orbital. Orbital action means the blade moves in a slight elliptical pattern as it cuts, which makes it cut faster through wood but leaves a rougher edge. Non-orbital gives you a smoother cut. Most jigsaws let you adjust the orbital setting, so you can dial it down when you need cleaner results and crank it up when speed matters more than perfection.
Blade selection matters more than the saw itself. Wood-cutting blades have larger teeth spaced farther apart. Metal-cutting blades have fine, closely-packed teeth. The blade packaging will tell you what material it’s designed for. Buy a variety pack when you’re starting out.
When should you grab the jigsaw instead of another tool? Anytime the cut isn’t straight. Making a pass-through for cables in a desk? Jigsaw. Cutting out a sink opening in a countertop? Jigsaw. Trimming a shelf to fit around a corner pipe? That’s jigsaw territory.
Compound Miter Saw: Precision Crosscuts Made Easy
A compound miter saw turns tedious crosscutting into a five-second operation. You’ll use this tool every time you need perfectly square cuts on boards, angled cuts for frames, or beveled edges for trim work. For office furniture projects like desktops, shelving, or leg assemblies, the miter saw delivers repeatable precision that’s nearly impossible to match by hand.
Start with a 10-inch model. The smaller blade handles everything beginners typically build, boards up to about 6 inches wide, while costing less and taking up less bench space than 12-inch versions. You’ll sacrifice some cutting capacity, but that rarely matters for furniture projects using standard lumber dimensions.
Single bevel versus compound comes down to one question: do you need the blade to tilt both left and right, or just one direction? Single bevel saws tilt one way and cost less. Compound models tilt both directions, saving you from flipping workpieces for certain angled cuts. For beginners building straightforward furniture, single bevel works fine. If you’re planning trim work or picture frames with complex angles, compound saves frustration.
The real time-saver shows up when you’re cutting multiples. Set the angle once, lock the fence, and cut ten identical table legs in minutes instead of marking and sawing each one individually with a circular saw.
How to Set Up Your First Power Tool Workshop
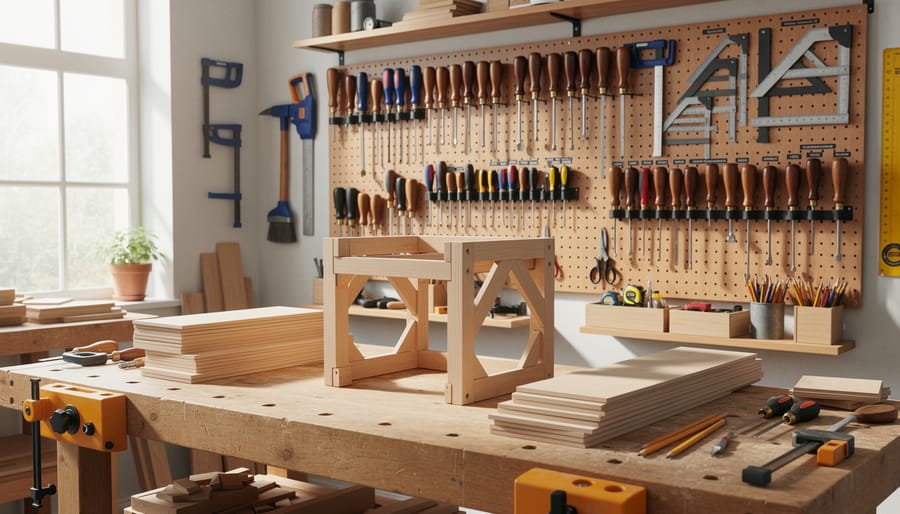
You don’t need a massive garage to set up a functional power tool workshop. A 10-by-10-foot space in a garage corner, basement, or shed gives you enough room to work safely with the five essential tools covered earlier. The key is organizing that space so you can move freely, minimize hazards, and actually enjoy building instead of wrestling with clutter.
Start by following these steps to create a workshop that works:
- Clear and assess your space. Measure the area, locate electrical outlets, and identify any obstacles like water heaters or support posts that will limit where you can place equipment.
- Build or buy a sturdy workbench. A 4-by-2-foot surface at 34 to 36 inches high gives you room to clamp materials and assemble projects. Plywood on a 2×4 frame works fine to start.
- Install adequate lighting. Position overhead lights directly above your workbench and add a task light for detail work. You need to see cut lines clearly and avoid shadows.
- Set up power access. Run a dedicated 20-amp circuit if possible, or at minimum use a heavy-duty extension cord rated for your tools’ combined amperage. Place a power strip on your bench for cordless tool chargers.
- Create a dust management system. Position a shop vacuum near your workbench and keep its hose accessible. For your sander and miter saw, connect the vacuum directly to the tool’s dust port during use.
- Organize tool storage. Wall-mounted french cleats or pegboard keeps your five core tools visible and within arm’s reach. Store saw blades, drill bits, and sanding pads in clearly labeled bins.
Your circular saw and jigsaw need open floor space for cutting sheet goods, so avoid cramming too much furniture into the room. Leave at least 4 feet of clearance on one side of your bench for maneuvering lumber.
For efficient organization that scales as your skills grow, consider implementing a 5S workshop setup from the start. This keeps everything in its place and prevents the tool-hunting that eats into project time. As you add more equipment, browse proven tool storage ideas that maximize vertical space without cluttering your work surface.
Skip fancy organization systems until you know how you actually use the space. Start simple, build a project or two, then upgrade storage based on what frustrates you.
Smart Buying: How to Choose Quality Without Breaking the Bank
You don’t need to spend a fortune to build a capable workshop. The sweet spot for beginner power tools sits in the mid-range tier from brands like DeWalt, Makita, Ryobi, and Bosch. These manufacturers offer reliable tools that will last through hundreds of projects without the premium price tags attached to professional-grade equipment. Skip the cheapest no-name brands you’ll find at discount stores, they often lack proper safety features and burn out quickly, but don’t feel pressured to buy the most expensive models either.
When comparing budget versus premium options, focus on what actually affects your results. A $150 circular saw from a reputable mid-tier brand will make the same quality cuts as a $400 professional model for the projects you’ll tackle as a beginner. The premium version offers features like better dust collection, longer motor life under heavy daily use, and more durable housings that matter to contractors but won’t change your experience building a desk or bookshelf.
Here’s what to prioritize and what you can skip:
- Prioritize: Variable speed controls, comfortable grips, clear depth and angle adjustments, good warranty coverage
- Prioritize: Cordless tools with at least 18V batteries if your budget allows (the convenience is worth it)
- Skip: Brushless motors for now (nice but not necessary for occasional use)
- Skip: Premium laser guides and advanced digital displays
- Skip: The largest size in any tool category (10-inch miter saws beat 12-inch for beginners)
The corded versus cordless decision comes down to your workspace. Corded tools cost 30-40% less and never run out of power mid-cut, making them smart choices if you have accessible outlets. Cordless versions offer freedom to work anywhere and cleaner workspaces without tangled cords. For your shop tools checklist consider starting with corded versions of stationary tools like your miter saw while investing in cordless options for your drill and sander.
Watch for combo kits in 2026 that bundle multiple tools with shared battery systems. These package deals often save you 25-35% compared to buying individually and solve the battery compatibility puzzle from the start.
Testing Your Setup: First Project Checklist
Before you dive into your first real project, run through this verification sequence. Think of it as a practice round that confirms everything works and builds your muscle memory with each tool.
- Start with your circular saw: Make a straight crosscut through a scrap 2×4. Check that the blade runs smooth, the guard retracts properly, and your cut is square. If it wanders, adjust your cutting technique before moving to project lumber.
- Test your drill/driver on both tasks: Drill a pilot hole through a piece of scrap, then drive a 2-inch screw into it. The drill should have enough torque to sink the screw flush without stripping the head. Practice adjusting the clutch settings.
- Sand a rough board face: Run your random orbital sander across a piece of construction lumber for two minutes. The surface should feel noticeably smoother, and you should see consistent scratch patterns. Empty the dust bag or canister when finished.
- Cut a gentle curve with your jigsaw: Draw a curved line on scrap plywood and follow it slowly. The blade should track without binding. This confirms your blade is installed correctly and you’re comfortable guiding the tool.
- Make a precise miter cut: Set your miter saw to 45 degrees and crosscut a piece of trim or a 1×4. The angle should be clean and accurate. Practice the motion of lowering the blade smoothly.
Once you’ve completed these verification steps, you’re ready to build a desk or tackle a simple shelf project. A basic wall shelf uses every tool you just tested: the circular saw rips boards to width, the miter saw cuts them to length, the drill creates mounting holes, the sander smooths everything, and the jigsaw can add decorative curves to the ends if you want. Keep your first project small so you finish it quickly and gain confidence.
Common Beginner Questions Answered
How loud will power tools be in my home workshop?
Most power tools produce sound levels between 85-100 decibels, which is comparable to a lawnmower or motorcycle. Your circular saw and miter saw will be the loudest, while your drill and sander are more moderate. If you’re working in a garage or basement, your family will definitely hear it, so plan your woodworking time accordingly. Always wear hearing protection, and consider foam padding under stationary tools to reduce vibration noise.
How bad is the dust problem, really?
It’s significant enough that you shouldn’t ignore it. A random orbital sander creates a fine dust cloud that settles on everything within 10 feet, and cutting operations produce sawdust that spreads fast. Start with a shop vacuum for cleanup and dust masks for yourself. As you get more serious, you can add dust collection attachments to individual tools. The good news is that five tools create less dust chaos than a full workshop, so it’s manageable with basic cleanup habits.
How long does it take to learn to use these tools safely?
You can learn basic safe operation of each tool in an afternoon of practice, but building confidence takes a few projects. Start with scrap wood to practice cuts and get comfortable with how each tool handles before working on actual furniture pieces.
Will I regret buying budget tools when I want to upgrade?
Not if you buy strategically. Quality budget brands hold resale value, and you’ll discover which tools you use most before investing in premium versions. Many woodworkers keep their original drill or sander for years even after upgrading other tools.
When should I add more advanced tools like a table saw?
Wait until you’ve completed 3-5 projects with your starter tools and can clearly identify what’s limiting you. If you’re constantly fighting your circular saw for rip cuts, that signals it’s table saw time.
Can I build real furniture with just these five tools?
Absolutely. Desks, bookcases, coffee tables, and simple cabinets are all within reach. You’ll use workarounds that advanced woodworkers skip (like cutting plywood with a circular saw and straightedge instead of a table saw), but the results can be just as good with careful measuring and patience. These tools built plenty of quality furniture before fancier options existed.
You’ve got everything you need to start building. Those five power tools, circular saw, cordless drill, sander, jigsaw, and miter saw, will carry you through countless projects, from your first simple bookshelf to more ambitious office furniture down the road. You don’t need a garage full of equipment to make something you’re proud of.
The hardest part is always starting. Pick one straightforward project that excites you. Maybe it’s a desk organizer, a floating shelf, or a simple side table. Use what you’ve learned here about safety and setup, take your time with each cut, and don’t worry about perfection. Your skills will develop naturally as you work.
Remember, every experienced woodworker started exactly where you are now, wondering if they had the right tools and questioning whether they could really do this. They could, and so can you. Your workshop doesn’t need to be fancy or complete, it just needs to be functional enough for you to begin.
Start small, build confidence, and let each project teach you something new. You’ll be surprised how quickly those five essential tools become extensions of your hands.
